Dimensions
The height and weight of cats can vary depending on the breed and the specific individual (it’s not a wide bone, but fluffy hair!), so the dimensions of the house depend primarily on this. Free space in the apartment also plays an important role - for cramped housing a small, simple stand is suitable, for a spacious country house - an impressive play complex with tunnels, scratching posts and hanging toys. The configuration and appearance of the structure can be absolutely anything - the variety of modern finishing materials provides wide scope for imagination.
Requirements for a scratching post
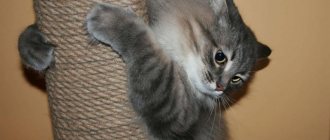
The stand combined with a scratching post is chosen by the furry pet, but the burden of creating a cat stand with your own hands falls on the owner. The range of pet stands offered in pet stores is wide, but there are specific requirements for the design:
- Sustainability. The stand should remain stationary during cat play. Therefore, you should not choose hanging models - they are not as stable as those that are attached to the wall or installed on the floor with a stand.
- Dimensions. All the hand-made cat stands in the photo are very tall. You can determine the appropriate size of a scratching post by taking a closer look at the place where your cat most often sharpens its claws and measuring the height at which it is located.
- The stand should be placed in a place convenient for the cat.
- In terms of structure and roughness, the scratching post should correspond to the pet’s preferences and not harm him.
An old and worn-out stand should not be changed: as a rule, the cat gets used to it, and the disappearance of a favorite toy can negatively affect the psychological state of the pet. Therefore, after the cat stand is made with your own hands, it is installed next to the old one. When the new version of the scratching post is used more often, the outdated one is thrown away.
"Built-in" cat house
If you have an old bedside table, you can set up a house for your pet right in it. Get rid of unnecessary drawers or shelves, if any, make a small curtain that will add privacy to the cat.
The inner walls of the cabinet can be upholstered with soft fabric, and a warm bed made of a pillow can be arranged on the floor. If the bedside table is a closed type, then simply cut out an entrance in one of the walls.
Base materials
The frame of a cat stand with your own hands is made from different materials, but preference is given to the following:
- Rattan.
- Paper tubes.
- Chipboard, MDF, fiberboard.
- Natural wood.
- Plywood.
- Plastic.
- Thick cardboard.
Shelves, booths and play complexes are often constructed from boards - laminate, lining, plastic containers, papier-mâché or corrugated boxes. Materials should not have strong, toxic odors. Baskets are woven from magazine, newspaper and paper tubes, wicker, roots, rattan or cut plastic bottles.
Sheathing materials
Since cats prefer to sleep on something soft, warm and comfortable, you need to choose the appropriate upholstery for the house: carpet, foam rubber, faux fur, furniture fabric or padding polyester.
All surfaces in play complexes are covered with fabric except for scratching posts - they are wrapped with twine or hemp rope. As a filler for mattresses and pillows, synthetic winterizer, foam rubber or granular material that retains heat is used.
For shedding and long-haired cat breeds, it is advisable to choose beds from the surface of which hair can easily be collected. The color of the textile should match the shade of the animal’s fur so that individual hairs will not be noticeable.
Cozy fabric cat house
A comfortable “nest” for your cat can also be made from fabric and foam rubber. First, draw a template of a wall with a roof on paper. Cut out 8 such blanks from fabric (two for each wall). Four similar blanks need to be cut out of foam rubber, only the size should be a couple of centimeters smaller. Separately prepare the bottom in the same way.
Next, sew each wall from two fabric and one foam (inside) blanks. Don't forget to cut and sew an entrance hole on one edge. Now you can completely sew the structure together, including the bottom. Place a soft mat on the bottom and launch your pet!
Mounting methods
In the manuals on how to make a stand for a cat with your own hands, it is recommended to attach the structure to plastic or metal corners in such a way that the animal cannot be injured. Soft parts and fabrics are fixed with a construction stapler - nails should not be used for this purpose, since the stand can become loose and the nails can come out, which is dangerous not only for the cat, but also for the owners. Any glue will do, as long as it has no pungent odor and is not toxic. Houses for cats of an original design - teardrop-shaped or tube-shaped - are secured to a metal frame with carabiners or wire.
Complex design
Before you start work, you need to decide what it will be like. Where will it be located? What height and width will it be? What should be included in this complex? Let's try to figure out these questions.
- since this complex will be located directly in your home, make sure that it is in harmony with the interior and does not stand out from the overall picture;
- When starting design, try to choose the complex that is suitable exclusively for your pet. It’s worth taking everything into account: dimensions, weight category and hobbies of the future owner;
- take care of the strength of this structure; it must be strong and stable in order to avoid unnecessary injuries.
What to make such a structure from and what tools will you need?
Tools:
- screwdriver;
- hammer;
- jigsaw;
- glue;
- pliers, etc.
Materials. For the base, it is customary to take chipboard sheets; they are convenient and easy to work with, and they are also relatively cheap. As for finishing, everything you have at home can be used here: carpet scraps, various fabrics, jute or just clothesline. Try to choose natural materials, since pets are prone to allergic reactions.
Related article: Installing front door glass on a Citroen C5-1
Floor structures
Floor standing scratching posts are large in size, but in some situations they are irreplaceable. Heavy and flat structures are chosen when the wall material does not allow mounting wall-mounted options. Self-made cat stands are optimal for active and young animals that have nowhere to throw out their energy and cannot go outside. Multi-tiered houses and complexes with beds and toys are suitable for several animals - they can not only frolic in them, but also relax comfortably.
Claw posts
According to the master classes and photos offered on the Internet, you can make a cat stand with or without a base and shelf. Long racks, the design of which does not include a base, are attached to the floor or ceiling using metal corners or screws. A do-it-yourself cat stand should be sized to match the height of the animal. An ideal material would be a tree trunk 7-10 centimeters thick or a plastic pipe with a diameter of 5 centimeters, braided with hemp rope, twine or thin rope. Before winding, the pipe is coated with glue, and the rope is tapped with a hammer to ensure a tighter fit of the turns. Since a long stand will require a lot of material, the wooden option is more profitable from a financial point of view, especially if the furry is too active and frequent replacement of the structure is required.
The minimum height of a column with a base is one meter. For the base, use multilayer plywood or a heavy wooden board 50-70 centimeters long and 40-50 centimeters wide. The claw post is created from a dense plastic pipe, which is attached to the base using self-tapping screws, screws or metal corners. The base is also covered with soft textiles - upholstery fabric or carpet, in the center of which a hole is cut for a post. The finishing material is attached with a furniture stapler or glue. At the top of the pipe you can attach a soft toy that can attract the cat's attention.
From a T-shirt or sweater
A fabric bed can be built using a T-shirt or sweater, which will keep your pet warm in cold weather. To do this, you should sew the neck and sleeves, filling them with padding poly for volume, and twist the product into the so-called “steering wheel”.
You might be interested in what interesting things can be made from old nylon tights
Sweater lounger
Stand with stand
Making a cat stand is much easier after studying master classes on creating scratching posts on the base. If the house contains several woolen pets, then the complex is designed in such a way that each animal has its own shelf or bed. They are located on the same level - this way the cats will not experience discomfort. The distance between the posts should not be less than 60 centimeters - otherwise the fluffies will interfere with each other, which can result in a conflict.
You can start making a step-by-step cat stand with your own hands using photos and drawings using the following master class:
- The foundation for the structure is being prepared. In a building with one post, the stand is made in the same way as for a separate post with a base; in the complex, the base is cut out.
- The pipe sections are attached with metal corners to the lower platform.
- A piece of fabric for the covering is cut out with marked holes for the stands. The material is stretched onto the base and secured with staples or glue.
- The posts are wrapped with hemp rope or twine.
- The dimensions of the stand are selected in such a way that it is comfortable for the animal to sit/lie on them. They are attached to the pipes with metal corners.
- On one of the beds there is a house. It is desirable that it be removable and washable. The most convenient fastening option is a zipper: one part of it is sewn to the bed, the second to the base along the perimeter of the house.
It is advisable to attach the completed complex with a stand and stand to the floor to prevent it from being tipped over by cats during games.
Making a mini-complex for cats
Let's start by cutting out rectangles of the required size from chipboard and fiberboard. The list of materials gives the dimensions of the parts for making a house suitable even for a large cat. It will fit a small cat, but if you want to save a little on materials, resize accordingly. We provided recommendations for determining dimensions in an article devoted to the design of a scratching post with a bed.
From the rectangles allocated for the walls, we cut out truncated circles with a radius of 27 cm. First, we draw the shapes that we will cut out. If you don't have a large compass, tie a marker or pencil to the string, measure the distance corresponding to the required radius, press the string in the center of the intended circle and draw this circle by pulling on the string.
The back wall will be solid, and for it we simply draw one truncated circle. In the lower right quarter of the front wall we draw a circle that will serve as the entrance to the house. In our example, the diameter of this circle is 22 cm. We draw 3 circles with a diameter of 5.5 cm to imitate the footprint of a cat's paw.
The outer circles are located at the same distance (17.5 cm) from the center of the large circle, the middle circle is a little further (19 cm). The figure below shows a diagram of drawing circles.
We cut out the holes with a jigsaw. Small circles can be cut out using a drill and drill bits, if you have them.
We place our truncated circles on top of each other so that they lie exactly one above the other. We mark seven points at which the walls will be fastened with slats. To make it easy to find these points on both walls, we drill holes through both walls with a thin drill. You can simply screw in and unscrew the screw.
On both walls, on the outside, at the points of attachment to the slats (where we just drilled through holes), we drill small recesses for screws so that they do not protrude beyond the plane of the walls.
We saw off 7 rectangular slats, plan them and trim the edges so that there is nothing sharp on them. The two bottom slats may be thicker than the others.
We fasten the walls using slats and self-tapping screws.
We cut out two blanks for the walls from fabric. You can simply circle the walls, leaving room for allowances. The fabric should have cut pile so that the cat does not put puffs and damage the claws by getting caught. We took Modena fabric.
Glue the fabric to the walls. It is important to use glue without a strong odor. A strong, unpleasant odor can scare away a cat. We use a hot glue gun and appropriate glue.
On the front wall we cut the fabric at round holes, trim off the excess and glue the edges. We glue another strip of fabric on top of the edges to make them look neat.
We place the house on the base the way it should stand. Between the two lower slats we will have space for the bed, let's measure it. We cut off the required amount of foam rubber and glue it to the place of the bed. (We marked with a circle the place where the pipe will be attached.)
Cover the base with fabric. We used blue fabric for the walls and light brown for the base.
For a stronger fixation, you can attach the fabric to the sides with a furniture stapler. If the fabric is fraying at the edges, cut it taking into account the allowance and cover the bottom with a sheet of fiberboard.
We cover the fiberboard sheet with fabric, which will be the roof of the house.
From the same fabric as the base is pasted over, we cut out two pieces with which we will cover the lower slats holding the walls together. Glue this fabric to the inner ribs of the lower slats.
We place the house on the base and fasten it using self-tapping screws, having previously drilled the recesses so that the screws do not protrude. Select self-tapping screws of such length as to securely attach the house, but do not drill through the base.
Cover the slats completely with fabric.
We attach the fiberboard roof to the house using a furniture stapler.
We straighten the fabric under the staples so that they are not visible. This is convenient to do with nail scissors.
Inside the house we cover with fabric those places that are visible from the outside.
The house is ready. All that remains is to add scratching posts and a bed.
We take a plastic pipe (diameter 11 cm, height 60 cm) and two bars to strengthen it. In order not to use metal corners to fasten the pipe, we cut two cylindrical bars from dry fallen wood that fit tightly into the pipe.
We insert the bars into the pipe and attach them with self-tapping screws.
We cut out a semicircular base for the bed from chipboard and the same fragment from fiberboard to cover the glued fabric.
We cut out a circle in the fiberboard for the pipe and put the fiberboard on the pipe.
We screw the bench to the block inserted into the pipe. Don't forget to make recesses for the screws.
We place the house on the back wall and substitute the pipe. To ensure that the house and the pipe lie parallel to the floor, we place something of appropriate thickness, for example, books.
We mark the points at which the pipe will be screwed to the base, drill holes for the screws and screw them in place. We fastened the structure with four self-tapping screws for stability.
Cover the bottom of the pipe with fabric. There is no point in wrapping this part with expensive rope - the cat will still not sharpen its claws so low, and for kittens there will be an inclined scratching post.
Glue the foam rubber to the bed.
Using a furniture stapler, we attach a rope for the toy to the bed. The staples must go through the rope, otherwise the cat will eventually pull it out while playing. We glue or tie a toy to the second end of the rope.
Cover the bed with fabric. For strength, we attach the fabric from below with a stapler. If the staples do not go in completely, carefully, so as not to loosen the structure, hammer them in with a hammer.
We glue the fiberboard to the bottom of the bed and wrap the pipe with rope. We glue the first and last 2-3 turns of the rope so that the rope does not unwind.
All that remains is to attach the inclined scratching post. We cut the bottom edge of the board at an angle of 45˚ so that the board fits tightly to the base. We cover the ends of the board with fabric. We covered the top and bottom with fabric of different colors, in accordance with the color of the house and base.
The board can be wrapped with thin rope or covered with strong fabric on which the cat can sharpen its claws. We screw the board to the base and to one of the slats holding the walls together. If a rope is used, then spread the rope and screw the board between the turns. If the board is covered with fabric, make cuts in the fabric, screw the board, close the cuts and seal them.
Our mini-complex is ready.
You can read recommendations on how to choose fabric, glue, rope, how to train a cat to a place, how to choose the right model of furniture for a cat and much more in our other articles.
Errors in making a stand
When assembling a cat stand with their own hands, pet owners often make mistakes by not taking into account certain nuances.
Firstly, reliability and stability are the key to such a design. If the scratching post falls, the cat will quickly jump off and will not be injured, but will no longer approach it out of fear.
Secondly, many owners try to save money on their pet by buying cheap, low-quality materials to create a stand. Such structures quickly become unusable and can cause significant harm to the health of a furry pet.
Thirdly, many owners are of the opinion that their work ends with assembling the rack, and then it’s a cat’s business. A small kitten may not be interested in a new piece of furniture, so it is worth placing his favorite toys on it.
With an adult cat, things are more complicated - if she has not previously sharpened her claws on a special stand, then you will have to accustom her gradually. This process can be facilitated by using a special hemp rope sold at a pet store to wrap the scratching post - it is soaked in valerian or catnip, which attracts the cat's attention. This will allow you to quickly accustom your pet to a new piece of furniture.
