DIY clothes for the sphinx - we knit and sew using a universal pattern, photos and videos
By nature, cats are endowed with a luxurious and warm fur coat, but there are times when it is necessary to insulate the animal, for example, during transportation. Or a breed of cat, such as the Sphynx, does not have a warm coat, so it needs additional heating. They need to dress not only when going outside, but also while in a cool room. The selection in pet stores exceeds all expectations, but the clothes made for the Sphynx will be unique and will be ideal for your own pet, because you will make it with your own hands.
A cat's wardrobe can consist of both knitted items and those made from ready-made fabric.
We knit clothes for the sphinx with our own hands in a step-by-step tutorial
When choosing yarn, we monitor the composition of the threads; they should consist of natural substances and should not be electrified. Before work, measure the circumference of the cat’s neck and the approximate length of the product.
Necessary materials:
- Wool threads or half with acrylic 100 grams
- Knitting needles No. 3.5
- Circular knitting needles No. 3.5
- Needle for stitching
When knitting, follow the sample shown in the photo below, substituting your measurements if necessary. Keep in mind that the product should not be too tight and restrict movement, and should not sag, preventing its owner from moving.
Knitting density 16 loops x 20 rows in 10 x 10 cm
We start the process in front of the neck and follow the pattern; if the knitting density is different, adjust the number of loops to maintain the dimensions.
- We cast on 25 stitches on the knitting needles and knit 3 cm with a 1x1 elastic band (1k.x1p.).
- We continue to knit in stockinette stitch for 10 cm.
- On both sides, 13 cm from the edge, we cast on 18 stitches and knit 61 stitches for another 10 cm.
- For the cutout, close off 21 sts in the middle, and in the next row cast on 28 sts instead.
- Another 10 cm in stockinette stitch, and close off the outermost 18 stitches on both sides.
- The last 10 cm with the main pattern and again 3 cm with the same elastic band. We close the loops.
- Sew the side seams and sleeves.
- We cast on loops from the neckline on circular knitting needles and knit with a 2x2 elastic band (2 knits x 2 purls) the collar, if desired, is either short or with a turn-up, so that it is comfortable for the cat.
Here is the simplest option; of course, the main pattern can be changed at your discretion, you can combine the colors and shape of the product, in general, everything is in your hands.
Cutting out the vest
To cut the vest you will need a shelf, a back and a hood. These details can be transferred from any children's blouse or Burda magazine.
Cut details:
- Shelf 2 children.
- Front strap 2 parts.
- Back 1 child.
- Hood 2 children.
- Pocket 2 children.
- Shelf lining 2 pcs.
- Hood lining 2 pcs.
The lining is cut out according to the shape of the parts of the shelf (together with the strap) and the hood.
Seam allowances
- shoulder, side seams, neckline, middle seam of the hood - 1.0 cm;
- armholes, sides (edges) of shelves - 1.5 cm;
- hem of the bottom, hood – 2.5 – 3.0 cm.
Let's move on to detailed tailoring for your beloved cat
To sew cat clothes we will use a universal pattern. It is suitable for a number of models: sweaters, overalls, dresses, etc.
If knitted items need a fastener, then when sewing you need to think about this detail. Lightning is contraindicated for ordinary cats, since the hairs get caught in a zigzag; in the case of the Sphynx, there is no such problem. But it will be more convenient to use velcro tape or buttons, and the latter will even serve as an excellent decoration. Velcro will allow you to quickly dress your pet. It is better to place the fasteners on the back so that they do not interfere with the cat.
A rustling material is not acceptable for use, as it will frighten the animal and will not want to wear this clothing.
Depending on the type of product, the sleeve may be shorter or completely absent.
You can also make holes in the hood for ears, it will be very cute.
Before cutting, be sure to try on the paper version and correct any inconsistencies so as not to spoil the fabric later.
Place the pattern on the laid out fabric with the wrong side up, carefully watch where the fold is needed, how many parts are required, trace it with chalk and cut it out.
We connect the side, shoulder, and sleeve seams, if any. We sew on a zipper or Velcro and begin processing the edges. The knitted fabric is twisted along the edge, it does not need to be edged, the rest is either folded and hemmed, or we use bias tape, this will look more aesthetically pleasing. Another interesting option is to crochet the edges of the neckline and sleeves.
How to sew clothes?
Before starting work, it is necessary to study the properties of the fabric. To do this, it is washed, dried and ironed. This helps determine the degree of shrinkage of the material. If the fabric shrinks a lot after washing, increase the size of the product slightly.
Pattern
The simplest costume for a cat that you can make with your own hands is a vest from the sleeve of an old knitted sweater. If the clothing is intended for a kitten, then a regular sock will do. This product is quite comfortable and does not hinder the movement of the animal. In addition, even those who do not have sewing skills can make it.
The sleeve (or sock) is placed on a flat surface, straightened and the places where it is necessary to make slits for the paws are marked with chalk. Next, the holes are cut out with sharp scissors and the edges of the cuts are sewn manually using a buttonhole stitch or using an overlocker. The vest is ready, all that remains is to add some decorative elements or practical details in the form of a loop for a leash.
Dark beauty
The process of sewing clothes for cats from fabric is a little more complicated. However, if you follow the step-by-step diagram proposed below, then there will be no difficulties. The step-by-step actions are:
- You need to check whether the pattern is the right size for your pet. To do this, all elements are transferred to paper, cut out and secured with tape. The resulting blank is tried on the animal. If everything matches, then move on to step 2.
- The material is folded in half with the wrong side out and spread on a flat surface. The fabric should be well ironed.
- Paper patterns are laid out on fabric, secured with pins and outlined with chalk. The parts should be placed at a distance of 2-3 cm from each other.
- Next, the patterns are removed and fabric blanks are cut out along the drawn lines. To get an even cut, use scissors with sharp edges.
- The cut out elements are swept together manually. The color of the thread should differ significantly from the shade of the material. This is necessary so that after the final stitching of the workpieces it can be easily removed.
- The resulting product is tried on a cat. If all sizes match, then proceed to final stitching. If not, then make the appropriate adjustments and try again.
- The parts are stitched using a sewing machine. First, connect the upper and lower parts, then move on to small fragments. At the very end, the fastener is sewn in and decorative elements are added. The edges of the product can be trimmed with braid.
Important! A zipper or Velcro fastener is only suitable for smooth-haired breeds. For fluffy cats, buttons are the best option for fastening.
New Year's outfit
The most complex clothing model for cats is a jumpsuit. The design of such a pattern consists of two elements of different sizes:
- large part - the right and left sides of the product;
- small - a wedge covering the stomach and chest.
The trouser legs should be loose so as not to hinder the movement of the animal. Elastic bands are sewn along the bottom edge. Be sure to provide a cutout for the tail. At the request of the owner, the product can be supplemented with a hood.
It is better to sew overalls from several materials. A practical raincoat fabric is suitable for the top. It protects the body from wind and rain, but it is quite hard and can chafe. Therefore, a lining made of soft material, such as flannel, is necessary. It is pleasant to the touch, absorbs moisture well and has the ability to retain heat.
DIY clothes for the sphinx: diagrams with photos and videos
Not everyone can afford to buy a cat due to allergies, but if you have been dreaming of a pet for a long time, then a Sphynx could be one. This breed is not allergenic, so it will not harm anyone, but will only give positive emotions. However, such an animal needs special care - a special diet, because not everyone can eat such cats, and improper nutrition can lead to bad consequences. They also need clothing that can protect them from cold winds and drafts. To do this, you can go and buy special suits and overalls in specialized stores, but you can also sew everything yourself. Do-it-yourself clothes for the sphinx can be made from ordinary fabrics - no longer used sweaters, leggings, socks, dresses, sweaters, or knitted from yarn that is left over, or unravel an unnecessary sweater.
Sweater for a cat
The Sphinx is an animal that has short hair, large ears like a bat, and is not always easy-going. But those who love this breed of cat know that they need to be kept warm at all times, because they are susceptible to cold. Therefore, it is necessary to insulate your pet if it is cold in the apartment or sometimes you take it out of the house. In this master class we will learn how to knit a cute sweater for your pet. For such a small product you will have to spend a little time, but then the cat or cat will be warm and will continue to delight the household for a long time.
Before we start knitting a sweater, we need to take measurements from the cat - length of the product, belly circumference, belly and back length, neck circumference.
Then we need to create patterns, which we can then use for further products for the cat. Knitting patterns are very simple, so even a novice needlewoman can handle it.
What we need to prepare:
- white wool mixture threads;
- red acrylic threads;
- knitting needles number 3;
- a needle with a large eye.
We start knitting from the collar. To do this, we put 71 buttonholes on the knitting needles with red threads and knit an elastic band, one front and one purl, to a height of seven centimeters. Now we divide the resulting fabric into two parts, where 25 buttonholes will be the stomach, and the remaining 46 will be the back. Now we switch to white threads and begin to knit with two balls, separately for the back and separately for the tummy.
1st row: belly - we knit all the buttonholes with knit stitches, while making 14 yarn overs evenly throughout the row. Back - we knit 23 buttonholes with knit stitches, then one yarn over and again with 23 knit stitches.
2nd row: we knit all the buttonholes purl on the back – that’s 47 stitches. Belly – 39 stitches are knitted with an elastic band one after another.
3rd row: tummy - remove the buttonhole, one yarn over, then again elastic 37 loops, and again yarn over and knit; back - remove, yarn over, knit 45, yarn over, knit. 4th row: back - purl everything; tummy - 41 buttonholes are knitted with an elastic band one after another. 5th row and 10th row: we knit the same way as the 3rd and 4th.
From the 11th row we begin to form armholes: tummy - close 3 buttonholes and knit 41 loops with an elastic band; back - close three buttonholes, purl the remaining 52 buttonholes. 12th row: back - close three buttonholes and purl the remaining 49; close three buttonholes, and then knit 41 loops with an elastic band. 13th row to 27th: we knit taking into account the pattern.
28th row: belly – you need to pick up three air stitches and then knit taking into account the pattern; back - three air and again taking into account the pattern.
How to sew clothes for a cat with your own hands
Almost all breeds of smooth-haired cats freeze in winter, especially if the home has low heating or is not very warm for some other reason. In this case, the owners have to dress their pet.
Also, many people choose outfits for an animal just for the sake of beauty, and some even prepare costumes for exhibitions and real fashion shows, where the main models are cats dressed in chic outfits.
If you dress your pet in specialized salons, it can cost a lot of money. It will be much more profitable to sew clothes for a cat with your own hands. This can be done relatively simply using these recommendations.
DIY cat clothes
Have you ever thought that your meowing pet also needs a wardrobe? Most likely not, because sometimes just loving a cat and caring for it is enough. However, this is not the case. Some breeds, especially short-haired ones, need suitable clothing that will save them from the off-season lack of heating or protect them from the sun or draft in the hot summer. It is not necessary to purchase wardrobe items for your pet in expensive stores; there is always the opportunity to make clothes for cats with your own hands. By following simple steps, you can dress your pet in an exclusive suit or pajamas. This is especially true for sphinxes.
Types of clothes for cats that you can sew yourself
To start sewing clothes for cats, you don’t need to draw a pattern every time; it’s enough to do it once, and then make the necessary adjustments as necessary. This pattern is suitable for sewing many types of clothing. Using it, you can make a comfortable T-shirt so that the Sphynx or a cat of another smooth-haired or hairless breed does not overheat in the sun. For this, the best choice of material would be knitted fabric.
If you take a denser material and make a slightly smaller cut for the neck, as well as openings for the paws, you will get the option of a warm sweater, jacket, sweatshirt or blanket for winter walks on the street or living in poorly heated rooms.
By choosing elegant jewelry and an interesting color composition, you can create a dress or suit in which your pet will not be embarrassed to be shown at shows.
Carnival costumes for cats look very cute:
When creating a sketch and pattern, it is extremely important to think about the arrangement of the parts so that the cat can breathe and move freely without getting entangled in the abundance of decorations. You should not sew on any sharp or piercing decorations, as well as those elements that the animal can tear off and swallow.
Functions of clothing for cats
Outfits for mustachioed pets can have different functionality. The model, color, and even quality will depend on the purpose of the outfit. The most popular function of cat clothes is aesthetics. This is especially true for small cats and cats. They are dressed up like children, choosing the brightest, most beautiful and practical things.
Sometimes cat owners buy clothes for their pet just to take beautiful photos
Owners of cold cats do not buy cat clothes for beauty. For example, sphinxes freeze, and not only during Epiphany frosts, but also simply on damp, rainy days. You can buy costumes for such cats for every season (summer can also be cold). And there are also cats whose coats are warm, but their paws get cold in winter. They jump onto their owner's lap to warm themselves. Of course, they don’t need a coat and a hat, but a blouse and socks are just the thing. Other cats have fluffy fur and warm paws, but their immunity is weak. Such animals can catch a cold in a draft, so they will need, for example, a vest or blanket robe to keep warm after bathing. In the summer, clothing is needed to protect the cat from overheating or exposure to ultraviolet rays.
Mine, if you don’t put him on it, won’t get out from under the blanket all day, even going to the toilet. If only you can lure him out with food. And when he's dressed, he walks around, he really likes it.
Chanterelle, forum user
https://www.u-mama.ru/forum/family/pets/673631/2.html#mid_22061402
outerwear not only keeps the cat warm, but also protects against insects
And if the cat needs periodic walks, then outerwear is one of the ways to protect against cold and rain. In addition, if you live in a private sector or there is a forest near your house, then ticks probably live on the trees. In this case, a raincoat is simply necessary. Of course, a raincoat alone will not save you from parasites, but it will make a certain contribution to protecting your pet’s health. In addition to walks, the pet can also be taken out into the world, for example, to an exhibition, on a visit, etc. In this case, an evening outfit is needed. Usually animals don’t really like such clothes, because they are not warm and cozy, but what can you do for the sake of beauty.
My cat has several homemade outfits. I don't think she likes her clothes. She loves the material from which these clothes are made, so she “endures” it absolutely calmly. For example, when it snows, she likes to watch the snowflakes fall from the balcony. I dress her, open the balcony window and stand with her.
Types of costumes for cats
Depending on what function certain cat things should perform, they are divided into several types:
- winter;
- demi-season;
- summer;
- casual;
- festive;
- protective;
- decorative
If everything is clear with seasonal clothing options, then with a weekend wardrobe everything is not so simple. For example, to participate in exhibitions you need a festive suit. This is not always easy to find in the store. Moreover, sometimes the principle of dressing such a store outfit is not at all clear. But he can impress the judges and influence the assessment.
Having seen some costumes in online stores, it is not always clear how they should be used
Taking the necessary measurements
The most important parameters for a cat costume pattern are the girth of the neck (measurement 1), the length of the animal’s back from neck to tail (measurement 2) and the size of its body in girth, which is measured in the area immediately behind the front paws (measurement 3).
Additionally, depending on the purpose of the clothing, the following data may be required to create a pattern: the distance from the front to hind legs; the volume of the cat's waist, which refers to the girth of the body in the area of the hind legs.
After receiving the necessary numbers, you can start creating a pattern. Later, the pattern made according to the received pattern must be attached to the pet and the necessary adjustments must be made, and the dimensions before this must be taken with a small margin, so as not to redo the work later.
How to take measurements?
The first thing you need to do is arm yourself with a measuring tape. The next task is more difficult - to ensure that the cat stands calmly during the measurement process. To do this, you need at least two people whom she would trust unconditionally. The first one will perform a distracting function, i.e. pet and give treats, and the second one takes measurements. The main measurements are:
- neck circumference (in the thickest place);
- back length (from the withers to the base of the tail);
- chest circumference (measured just behind the front legs).
These measurements are enough to create patterns for basic cat clothing. Knowing the standard parameters, it’s easy to sew a blanket or sleeveless vest. For more complex suits, additional measurements will be required. When sewing a jumpsuit with a hood, you need to know the distance from the base of the cat's neck to its eyes, as well as the circumference of the head. And when creating a spectacular dress for an exhibition, you need to measure the circumference of the abdomen, which is measured in front of the hind legs.
Bros
All measurements should be taken with one centimeter tape. Seam allowances are usually not left; it is enough that the centimeter is in a free position when taking measurements. However, if the pet has long hair, then it is better to provide a small supply of fabric, since close contact of clothing with the fur can cause discomfort.
Pattern of clothes for a cat: a few simple ideas
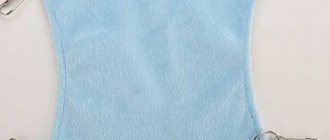
- The simplest pattern for cat clothes is if you take as a basis a pant leg or sock of suitable sizes, mark holes for the paws on them with chalk, and then carefully cut them out using nail scissors.
This will save time on drawing up the pattern and will only require stitching the edges, sewing on the necessary fasteners, decorations and any useful accessories, for example, a loop for a leash.
- The second simple pattern of clothes for a cat in this photo:
To create such a pattern, you will need to measure the cat's neck circumference, back length, bottom circumference and distance between the legs. It is necessary to provide allowances for the fastener and correctly mark the holes for the paws.
Fabric cutting, fitting and sewing
Before cutting, the fabric needs to be washed and ironed to make sure how much it shrinks. In this case, you should definitely take this into account when sewing and select a slightly larger size than the animal needs.
The layout of the blanks is carried out on the fabric folded in half from large elements to smaller ones so that the direction of the grain thread becomes parallel to the edge of the fold.
Then do the following:
- secure the paper template with pins to the fabric and carefully trace the design;
- then cut out all the necessary parts, not forgetting the seam allowances;
- sweep them away with a bright thread and put the resulting clothes on the cat;
- If there are any problems, apply the markings necessary to correct them with chalk.
Well-fitted clothing items can be finally put together. First, fasten the upper, located on the back, and the lower, running along the stomach, halves of the suit. The seams on the sides and in the shoulder girdle are sewn with a zigzag stitch with flat overlapping stitches. The width of the armhole must be selected depending on the purpose of the item of clothing, narrowing it for a winter version of the suit, and widening it for a summer T-shirt.
Then you need to process the edges of the clothing. To do this, you can use a braid with an elastic band. It is attached from the front side with the same zigzag stitches, stretching it a little before doing so, so that the braid does not gather and compress the edges too much. This will not only prevent the edges from fraying, but will also be a nice decoration for your cat costume.
The last stage is sewing fasteners and accessories to decorate the costume. There are a large number of fasteners that you can choose from for your cat suit. There are several recommendations in this regard, but first of all it is necessary to take into account the breed of the animal.
The zipper is best for smooth-haired pets, otherwise the hair will get stuck in the mechanism. In the same way, hairs will linger on Velcro. Universal fastenings are buttons that can be placed either on the back or under the chest of the animal.
After completing all these operations, you will make a luxurious costume for your pet.
Let's get started
To work we need:
- knitted or woolen fabric.
- scotch
- pins
- scissors
- Velcro, zipper or buttons
- bar of soap
- paper
We have a drawn or printed pattern for a cat's clothing. Once you have taken your cat's measurements, try to see if the pattern will fit you. If it doesn’t fit, it’s okay, you can always adjust the pattern on paper.
We bend sheet A-4 in half so that the breast is made in 2 copies. We place the back pattern on paper. Trace and cut out. We take tape and fasten the sides and shoulders together. We have a blank, measure it for a cat. If you don’t need to redo it, remove the tape and straighten the pattern. We attach the pattern pieces to the fabric, secure with pins, and outline with a piece of soap. We cut out the parts, not forgetting about seam allowances and space for Velcro or buttons. Remove the pins and set aside the pattern. We sew Velcro to the back using a machine or by hand. Sew the shoulder and side seams. Next we need to finish the neckline, bottom and armholes. If you have knitwear, it is better to trim it with stripes from the same knitwear. If finishing is needed, a braid with an elastic band works well. Sew to the neckline, hem and armholes. The vest is ready.
Even a novice seamstress can handle sewing such a children's vest, and the new thing will bring a lot of pleasure to the child; he will happily wear it to kindergarten, school or for any occasion.
Let's sum it up
So, based on one pattern, you can make a large number of costumes and significantly update your cat’s wardrobe. For those who know how to sew, this will not be a problem and will not require serious financial expenses. Moreover, sewing costumes for a pet will be an excellent opportunity to realize your interesting ideas and turn into an excellent long-term hobby.
Sources:
https://sdelala-sama.ru/shityo/2874-odezhda-dlya-sfinksa-svoimi-rukami.html https://dekormyhome.ru/rukodelie/odejda-dlia-sfinksa-svoimi-rykami-shemy-s-foto -i-video.html https://www.samoshvejka.ru/news/kak_sshit_odezhdu_dlja_kota_svoimi_rukami/2017-03-19-352