Any pet requires proper care and attention. And aquarium inhabitants in this regard are no exception. For a comfortable life, the owner's admiring glances alone are not enough for them. The aquatic environment in which they live must be cleaned of mechanical contaminants and waste products. That is why every aquarist needs to know how to properly install an internal filter in a fish aquarium. Only in this way will the wards feel good, and the breeder will not cease to admire their beauty for a long time.
Types of filtration devices
Before purchasing a cleaning device, you need to understand which one will be the best choice. When purchasing, take into account the features of the installed fish housing, its volume and dimensions, as well as the expected number of residents and plants. You will have to choose one of the two most common options: an internal or external treatment unit.
Models for use within an aquarium ecosystem are the simplest. They are easily attached to glass walls using hooks or suction cups. In this case, the liquid is drawn into the lower part of the device, passes through the filter layers (usually a cotton or foam base) and comes out from the top, already cleaned. At the exit, it is enriched with oxygen (via an aerator) and, together with a stream of clean water, the aquarium inhabitants receive the air bubbles necessary for life.
These cleaning devices are extremely easy to use and are great for beginning fish breeders. Even those who have never done this before can understand the peculiarities of their operation and installation.
Types of filters for aquariums
Before you begin installation, you need to understand which filter you need.
Manufacturers offer external and internal filters. The first ones are attached outside, the second ones - inside the aquarium. Choosing the right filter should be based on the characteristics of a particular aquarium, its size and volume, as well as the abundance of living plants and fish.
Internal filters are the simplest type of filter, held on by hooks or suction cups. Water enters the lower part, passes through the filter layers (synthetic wool, foam rubber) and exits through the upper part.
The jet is directed towards the surface, due to which the water is enriched with oxygen. This option is suitable for beginner aquarists with small aquariums who want to independently learn the features of its operation and installation.
Advantages of the internal filter:
- affordable price and the ability to purchase at any pet store,
- low energy consumption,
- sufficient water filtration for fish to live in a compact aquarium.
Flaws:
- takes up space in the aquarium,
- Suitable only for small aquariums,
- To clean, you need to put your hands into the aquarium, which can lead to infection of the fish with microbes.
Recommendations
When understanding from photos and videos how to properly install and place a water filter in an aquarium, how deep and how to immerse the unit, you should take into account several important nuances:
- When installing the device, first fill the container with liquid to at least half. The filtration medium must not operate in contact with air.
- Before assembly, thoroughly rinse and dry all components of the structure.
- The unit can only be immersed when it is turned off.
- The air intake tube is led out. For convenience, it should be fixed on the edge of the glass wall with a special fastener.
- Only after carrying out all the above-described manipulations can the device be turned on.
Location
Looking at the video on installing an internal filter in an aquarium, how it should stand (position) correctly, it is easy to understand that this small world is a home for its inhabitants. And the primary task of every aquarist is to take care of comfortable living conditions for their wards.
Don't make the mistake of thinking that simply changing the water regularly is enough. Systematic fluid changes disrupt the biological balance. This is if you do not take into account that the process itself is quite labor-intensive, exposing aquarium inhabitants to unnecessary stress. To avoid such negative consequences, you should install a special cleaning device.
Internal filtration devices are the best option for use in containers of no more than 200 liters. They are affordable, easy to operate and install. Basic care involves washing the filter material once every 1-2 weeks. Additionally, you can install an aeration system to provide the fish not only with clean water, but also with oxygen. Despite the fact that pets live in an aquatic environment, they breathe air.
External cleaning devices are located outside the aquarium ecosystem - outside. The cleaning unit does not require installation inside the tank, as a result of which its dimensions can be significantly larger than the submersible version. Accordingly, this type of placement guarantees higher cleaning efficiency. Such devices, as a rule, have two or more sections: a section for mechanical filtration (where contaminant particles settle), a section with biomaterial (the place where bacterial colonies form).
How to care for the device?
Caring for the device depends on the type of filtration : chemical, biological or mechanical.
- You should not wash the filter frequently, this will upset the balance in the aquarium, because for proper functioning and full-fledged operation it is necessary for beneficial bacteria to appear in it.
Bioceramics and spheres are washed every three months. The substrate requires cleaning with water every 2 months; with more frequent washing, the useful layer is washed off. - Activated carbon is replaced once every 2 months, and ceramic parts every 6. Do not replace it at once, it is better to divide it into 2-3 stages.
- Only the filler needs to be cleaned regularly. The purification process should occur in aquarium water as quickly as possible.
- For cleaning, use only water and a cloth; do not use chemical cleaners.
- Replacing the sponge in the filter is possible only in one case - if it has lost its water filtration properties.
- It is necessary to clean the impeller, where dirt and algae accumulate.
Everyone chooses the type of device that suits them. However, compliance with the general rules for installing and operating the filter guarantees comfortable living conditions for the inhabitants. Such an aquarium will delight everyone around you.
- Related Posts
- Should the filter in the aquarium be running constantly and can it be turned off at night?
- How to choose and care for a sponge for an aquarium filter?
- What kind of filter should be for a small aquarium?
How to properly install a filter in an aquarium - location and general installation rules
MBFT-75 Membrane for 75GPD
SF-mix Clack up to 0.8 m3/h
SF-mix Runxin up to 0.8 m3/h
When choosing a suitable place to place the device, it is important to understand that it largely depends on the displacement and modification of the fish house. In addition, during installation a number of basic recommendations should be taken into account:
- When starting to assemble the structure, do not be lazy to study the instructions in detail and make sure that all components are available.
- Assemble the device only in dry, clean condition.
- Immerse it while it is turned off in a container that is at least half full.
- When installing a submersible model, first move the aquarium inhabitants to a temporary home.
- If, after all the manipulations performed and activation of the filtration agent, a characteristic flow appears, you have done everything correctly.
Where to install a filter in an aquarium
- Before you begin installation, you need to fill the aquarium at least halfway with water, since the filter should not work in an empty container.
- All parts of the device must be thoroughly dried before assembly.
- Many people are concerned about the question of how deep to install the filter in the aquarium . The internal filter is attached to suction cups at approximately a distance of 3 cm from the surface, but so that it does not touch the bottom. If the depth is small, then try to leave more distance on top, but in no case should the device lie on the bottom. The water will constantly evaporate, so the position of the filter must be checked regularly.
- The device is immersed in water with it turned off.
- The air intake pipe is vented outside, and it will be a plus to have a mount for fixing the pipe.
- After this, you can plug the device into a power outlet, and if a current appears, it means everything was done correctly. The wire should hang freely downwards from the outlet.
Using the damper, you can regulate the pressure and direction of movement of purified water. But before you adjust anything, do not forget to unplug the filter from the outlet.
In order for the device to serve for a long time and properly, it is necessary:
- regularly clean it from dirt,
- do not leave it in the water turned off, otherwise all the inhabitants of the aquarium will be poisoned,
- turn off the device before putting your hands in the water,
- It is permissible to turn on the device only after complete immersion in water,
- Before cleaning the device, turn off all electrical appliances in the aquarium and only then can you remove the device from the water.
Installation of the internal filter device
Installing such a unit is completely easy. Even a novice fish breeder can easily cope with the task. As an example, you can consider how to properly assemble and use the internal filter for a Silong aquarium. For this:
- Read the manual for the device.
- Fill the container with liquid and provide residents with a temporary habitat.
- Immerse the collected cleaning product in water (the layer of aqueous medium above it is at least 2-3 cm).
- Securely attach it to the glass wall of the tank using suction cups or hooks.
- Please note that the air tube remains outside.
- Turn on the system and watch for a stream-flow to appear.
In the future, all that remains is to monitor the operation of the cleaning equipment and timely clean the filter base from accumulating contaminants.
How to correctly position an aquarium filter, assembling an external filtration device
With such a cleanser, everything is somewhat more complicated. To do everything correctly, do not ignore the instructions supplied by the manufacturer:
- Unpack the components, remove all hoses, sponges, and drains from the box.
- Just in case, take a few rags. Leakage during installation of the unit cannot be ruled out.
- Assemble it according to the instructions in the manual.
- Make sure that the water intake tube is inside the filled container.
- Now fill the special tank with aquarium liquid and open the supply. The water should flow on its own.
- Watch carefully so that it does not come out of the second hole.
- After filling, the supply of H2O must be shut off.
- Next, start connecting the outlet hose. Make sure it is also filled and connected.
- Attach another element to the drainage system and open both taps.
- Connect the power, wait until the water begins to move in the container.
Internal filter
Internal filters are distinguished by their simple design, have a low-power water pump and are intended for aquariums with a volume of up to 100 liters. The main purpose of such equipment is to purify aquarium water from suspended matter and other mechanical contaminants. Most models do not even have a compartment for biochemical cleaning; therefore, they are intended for aquariums where water changes are performed on a regular basis.
Internal filters are distinguished by their simple design, have a low-power water pump and are intended for aquariums with a volume of up to 100 liters.
This device is located inside the aquarium and is compact in size. The pump used usually has a performance rating of 300-500 liters per hour. Some modifications have a special air valve for simultaneous aeration and dissolution of oxygen necessary for fish and other aquatic organisms in the water.
The advantages of internal filters include their minimal energy consumption, efficiency of water purification in a small aquarium, affordable cost and ease of installation. Disadvantages include the lack of biochemical purification, as well as the impossibility of using such devices in large aquariums.
Installing the internal filter is not difficult. It is necessary to decide on the location where the cleaning pump will be located. Typically, internal filters are sold disassembled, so it will need to be assembled in accordance with the instructions, while following some recommendations:
- Attach the filter to the suction cup, positioning it so that the upper part is located approximately 3 centimeters deeper than the surface.
- You can only immerse the pump in water after disconnecting it from the electricity.
- The air intake tube is brought outside and additionally secured so that it does not end up under water.
- Plug the pump into the outlet and check for flow, which indicates that the device has been assembled and installed correctly.
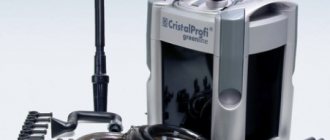
A distinctive feature of the internal filter is its small size. Such units are located inside the aquarium. Suction cups are used as fastening. Inside such devices there is foam rubber or cotton wool, which is used to clean the liquid from the tank.
The internal aquarium filter is chosen by experienced and novice aquarists. After all, using such units is not difficult.
Among the advantages are:
- Relatively low cost. Therefore, such devices are purchased everywhere.
- To purchase such a unit, you can visit a pet store.
- To maintain the device in working order, a minimum of electrical energy is required.
- The internal model is popular among owners of small containers.
- They are located inside the container, so some of the space is occupied.
- They are advantageous to use provided that the tank dimensions are small. Otherwise, it will not be possible to thoroughly clean the aquarium.
- Cleaning internal devices is a troublesome and unsafe undertaking. After all, there is contact between hands and aquarium water. As a result, bacteria and harmful microorganisms often enter the liquid.
Before installing the internal filter, study the instructions. It contains the main points.
It is necessary to install the filter in the aquarium in a certain order:
- After unpacking, the equipment is inspected. This allows flaws and damage to be identified before installation. Only a working filter is mounted in the container.
- Shellfish, vegetation and fish are removed from the aquarium, in which internal filters are installed. The liquid in the reservoir is completely replaced.
- When choosing a location, the placement of vegetation and decorative components is taken into account. The unit must be concentrated so that it is covered with water. The distance between the device and the top layer is 3–5 cm.
- To fix the devices, suction cups and hooks are used. Manufacturers include the appropriate fasteners in the kit.
- The drainage pipe is led out. During installation, it is fixed in a certain position.
- The unit is connected to mains or autonomous power supply. It all depends on the volume of the tank and what vegetation is present.
- To check the functionality of the unit, place your palm near the corresponding hole. A stream of water should come out of the corresponding hole.
- Launching and adaptation of fish.
We suggest you read: Starting a marine aquarium for beginners
It is not enough to assemble the internal filter correctly. The functionality and condition of individual components are checked at established intervals.
Installation of bottom cleaning device
When familiarizing yourself from photos and videos with the correct installation and location of the Aquael filter in an aquarium or the operation of similar devices, it is worth remembering that they are not only external and internal. Some models are designed for installation at the very bottom of the fish house. They are used if the container is too small and there is no decorative vegetation at all.
Such a unit is made in the form of a narrow plate with a filter material located inside and a large number of holes that are necessary for a constant flow of liquid. In this case, simply lowering the filtration medium into the container and connecting the necessary tubes to it is not enough. You should first remove the soil from a separate area and place a special frame made of environmentally friendly plastic there. The device itself will be installed on this bottom rise.
It doesn’t matter what kind of device you use to purify water, the quality of the unit’s operation and the chemical and biological composition of the liquid environment in which the fish live directly depend on the correctness of the actions performed. When getting down to business (assembly and installation), be sure to read the manufacturer's manual.
Which aquariums require an internal filter?
Installing an internal filter is appropriate in small and medium-sized aquariums with a volume of up to 200 liters, in which they usually try to combine the cleaning function with additional aeration of the water.
These devices are quite compact and operate relatively quietly, so beginners tend to purchase them for small bodies of water; many are frightened by the difficulties of installing external models or the risk that the external filter will be dropped by an animal or child. In addition, submersible equipment is chosen by aquarium owners who often suffer from power outages; such equipment will not leak or flood the floor. And it’s easier to clean the internal filter. But if the aquarium is very tiny, and the submersible model takes up the useful space of the reservoir, what should you do then? A corner filter may be a partial solution to the problem.
Popular sections:
Aquariums Sale of kittens and puppies Terrariums Products for cats Products for dogs
Phytofilter
If you have decided to get fish and are now looking at photos and videos of how a filter should stand and work in an aquarium, how to secure it and use it to filter liquid, you will probably come across information about such devices. The activity of biofilters is based on the work of special microorganisms that intensively absorb ammonia released during the life of the inhabitants.
AMETHYST - 02 M Residential building for up to 10 people or up to 2 cubic meters/day.
Aeration unit AS-1054 VO-90
Main table dispenser AquaPro 919H/RO (hot and cold water)
As a rule, such devices are made independently. The simplest option is the “bottle” model, the dimensions of which directly depend on the displacement of the fish housing. To do it yourself, you will need to do the following:
- Take a plastic bottle and make small holes in its bottom. The diameter is not important, the main thing is that water flows inside freely.
- Wrap the area tightly with foam material.
- Secure it with plastic clamps to prevent unnecessary contamination of the filler.
- Fill the container about halfway with gravel.
- Place the hose of the spray compressor through the neck.
Thus, due to the “aerolift” effect, the purified liquid will be drawn out of the homemade tank from above, and contaminated liquid will flow from below.
External filter
An external filter in an aquarium is often called a canister filter. After all, it includes a container, hoses and additional components. The tubes are lowered into the tank, and the container is located outside.
Why are they attractive?
- The device is suitable for cleaning large tanks and non-standard containers.
- The process of replacing filter elements is quick and easy. Installation takes minimal time.
- There are compartments for fillers. This makes the operation process easier.
- Filters are concentrated on the outside. Therefore, the aquarium space is used for phenotypes, vegetation, and decorative elements.
Peculiarities
Not all aquarists use such filters. That's because:
- They are large in size, so they are not suitable for small spaces and containers.
- The cost of such equipment is high.
- The units are characterized by increased productivity. Therefore, experienced aquarists equip hoses with nets. Otherwise, the fry get inside the equipment.
Installation process
It is important to know how to install external filters for aquariums. After all, how effectively it will function depends on compliance with the stages.
- Before installation work, the following elements are prepared: a flashlight, a spring stand, and rags. The aquarium must be placed on a flat surface.
- Unpacking filters, visual inspection.
- To know how to assemble the device, study the instructions. In it, manufacturers record important points. All taps that manufacturers place on the unit are closed before assembly and installation.
- Fixing the tube, which is complemented by a rounded end, and placing it inside the located reservoir. This tube is used to collect fluid. A short tube is used to drain water.
- An outlet tube is included with the equipment. It is brought to the unit and filled with liquid. After this, the aquarium is connected to the drainage system.
- The filter taps open carefully. The unit is connected to the network. If all steps are performed correctly, the liquid inside the tank will move.
If water does not move through the tubes, then they are checked for air pockets. After all, they disrupt the performance of the entire unit.
Differences by filtration type
When studying from a video how a filter works in an aquarium and at what depth to install it, it is important to understand how different types of aquatic environment purification differ from each other.
Mechanical
Aimed at ridding the fish habitat of particles of small debris and waste products. For this purpose, devices made of porous structures (sponge) are usually used, which best retain contaminants. It is recommended to use this method in parallel with others, since it alone is not enough to maintain the required quality characteristics of the liquid.
Chemical
Effectively purifies water from harmful impurities that appear over time. Of particular danger in this regard are: chlorine, toxic substances containing nitrogen, heavy metals, and drug residues. It is best to use activated carbon for chemical filtration - it is cheap and effective. As well as zeolite resin, which not only cleans the aquatic environment, but also has a healing effect on aquarium inhabitants.
Biological
It is the reproduction of special microorganisms that rid H2O of ammonia impurities. There is no need to artificially populate them from the outside. They are already available in fish houses, just in limited quantities. All that remains is to propagate, for which it is necessary to create the appropriate conditions. Special fillers can help with this: plastic, padding polyester, bioceramics, foam rubber, pebbles. These materials perfectly enrich the liquid with oxygen.
How to install the internal filter
Installing an internal filter in an aquarium is easy. This device does not require the purchase of additional equipment or upgrades, therefore, regardless of the model, it is assembled in full accordance with the user manual.
1. Familiarization with the device. Correct installation of any filter begins with checking its completeness and reading the instructions. We recommend doing this before purchasing the cleaner. If you doubt your design abilities, it is better to ask a consultant to clearly demonstrate the assembly process to you or carefully describe it.
2. Filter assembly. Almost all internal filters are assembled using the same algorithm. The first step is to place the filter material in the glass of the device. Then, if the design allows for it, insert the rotor into the pump. Attach the pump to the glass and connect the aeration tube. If recognizing parts is difficult for you, check out the video attached to the article.
On some models, the mounting panel is separated from the body. Insert the fasteners on the glass into the grooves provided on it and place the suction cups in the corresponding slots. Everything is ready to install the filter in the aquarium!
3. Securing the device. Almost all aquarium filters are attached to the wall of the container using suction cups. Simply press them against the glass and press well. Submersible filters must be completely under the water surface; under no circumstances turn on the device if it protrudes from the water. The correct depth for placing the filter is 2-5 cm from the surface. One of the ends of the aeration tube must certainly be in the air. If possible, place it outside the aquarium, with access to the room, so oxygen will dissolve in the water more efficiently, because under the lid its content is reduced. If the plastic tube with the factory fastening slips off, it can be attached to the side with a regular office clip.
4. First start. Turning it on after installing the filter in the aquarium essentially involves working in testing mode. For this reason, it is recommended to observe the operation of the filter. Adjust the immersion depth.
5. Power setting. At the time of first switching on or immediately after it, it is recommended to turn the power regulator to medium settings. Further adjustments should be made taking into account the volume of the aquarium, the degree of contamination and, of course, the habits of its inhabitants. Some fish, particularly those with small and weak fins, cannot tolerate too strong a current.
Cleaning the installation
Filtering devices play a vital role in the life of a small ecosystem. In order for cleaning products to function properly and provide clean water for your fish, they must be maintained. For this:
- regularly clean the structure from accumulated plaque and other contaminants;
- when removing it from the container, be sure to disconnect it from the power supply;
- do not leave the device turned off inside, otherwise the fish may die due to the concentration of harmful substances accumulated in the filter base;
- turn off the unit before cleaning;
- Do not turn it on until you put it in water.
Only by following all of the above recommendations will it be possible to maintain the device in working condition and save the lives of your pets.
Main table dispenser AquaPro 929CH/RO (cooling/heating)
Floor dispenser AquaPro 311 (empty, without cooling)
Floor-standing dispenser AquaPro 6207CH (cooling/heating/room temp.)
How to properly assemble and install an aquarium filter: instructions for use
An air supply hose is always included with the model from the store. If the product is manufactured independently, it must also be provided. However, they are attached in the same way:
- Place one end of the tube to the hole on the device, and place the other above the surface of the liquid. Fix it to the wall from the outside using a special fastener.
- Make sure that the air intake element is strictly above the water. Otherwise, it will “choke” and suck in air incorrectly.
- Pay attention to the oxygen supply regulator. After installing the structure, place it in the middle position.
- Now observe the behavior of your pets. Some people like a noticeable flow of water, others try to avoid it. Adjust the speed of the current so that all inhabitants are comfortable.
How to extend the life of filter equipment
Every aquarist wants his pets to feel good and his aquarium equipment to last as long as possible. To achieve this, you should:
- Clean all components of the unit regularly, following the information in the instruction manual.
- To prevent fish and other inhabitants of a small ecosystem from being poisoned by toxic impurities, the treatment system must function uninterruptedly.
- It is necessary to start the filter media when there is a sufficient amount of liquid in the container.
- Cleaning can only be done by turning off the power supply.
- Before work, you should carefully study the instructions from the manufacturer.
