Placing an IV in a dog: rules and step-by-step instructions
Sometimes situations arise when it is necessary to install an IV in a dog in order to improve the pet’s condition, and sometimes even save his life.
You need to figure out how to assemble the system for administering the drug and correctly perform all the necessary steps.
When to bet
An IV is necessary in various situations. It is used in the following cases:
- postoperative period;
- acute poisoning;
- prolonged stomach upset in the form of diarrhea;
- renal failure accompanied by dehydration.
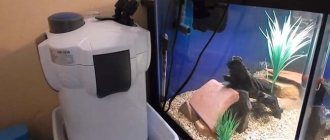
System structure
The drip device consists of several parts. Before you start using it, you need to know what all these parts are for.
Main part
This is a flexible tube. Along it, the drug gradually moves from the container to the needle and then enters the body.
Fence needles
There are only two of them in the set. Inserted into the lid of the container with the drug. One of them is connected to the tube, the second is equipped with an expander and provides air flow into the container with the infusion solution.
Dispenser
This is a box made of plastic, equipped with a slider or wheel. The dispenser is designed to regulate the speed of liquid movement.
Container chamber
The device is made of transparent soft plastic. A filter is placed inside the part to prevent air from entering the tube and blood.
Cannula
The main purpose of this part of the structure is to introduce additional drugs into the solution.
The part is a container made of plastic or a rubber pad.
Types of infusion needles
When placing an IV, different games are used. They have a number of features. If you lack the skills, not all types can be used at home. This issue needs to be examined in detail.
Infusion disposable
Attached to the system. They differ in thickness and length. For subcutaneous injection into the withers, a medium-thick long needle is used.
For intravenous infusion, which is considered more traumatic, a needle of medium length and minimal thickness is used.
Butterfly needle
A short, fairly thin needle. In people it is injected into small veins. Suitable for small pets. It has a special design: “wings” made of plastic are placed in front of the expander. With their help, the needle is conveniently fixed.
Intravenous catheter
This is a plastic tube designed to be inserted into a vein. The drug enters through the catheter, and then the gateway is closed with a stopper.
It is worth knowing how many days such a needle can be used: it can remain in the vein for up to six days, but only with proper care of the puncture site.
Can all needles be used independently?
Not all needles are allowed to be installed on your own by a puppy or an adult dog.
The catheter must be inserted exclusively by a veterinarian . In the absence of experience, there is a risk of damage to nerve endings and veins.
Algorithm for preparing a dropper
Before performing basic manipulations, it is important to properly prepare the IV. This procedure is performed in several stages.
Preparation
Hands are treated with an antiseptic. After this, gloves are put on.
They should also be degreased.
Opening the bottle
The next step is to open the bottle with the solution and the system itself. The entire metal cap should not be removed: only its central part is removed.
Inserting needles into the bottle and fixing the container
Both needles are inserted into the rubber stopper. After this, you need to fix the bottle so that it is located upside down.
At home, you can use improvised materials for this purpose, for example, a mop handle and tape.
It is necessary that the container is located at a height of 45-50 cm from the dog.
Preparing the dispenser
The dispenser lever should be moved all the way and thus clamp the tube.
After this, you need to press the reservoir with the filter several times so that it draws in the drug. All that remains is to shake the chamber to remove excess air and slightly lower the lever on the dispenser, thus adjusting the speed of movement of the liquid.
Preparing the animal
When the dropper is ready for use, you need to calm the dog and prepare it for the procedure.
Optimal places for infusion
It is recommended to insert the needle into the wide veins located on the pet's front legs.
Removing hair at the injection site
The next step is to remove the hair between the elbow and wrist. It is shaved with a machine or cut with scissors.
Bandaging the leg with a tourniquet
The limb is tightened before the puncture. The tourniquet is applied slightly above the place where the infusion will be performed.
Inserting a needle into a vein and fixing it with an adhesive plaster
The needle is disconnected from the IV and carefully inserted into the vein parallel to the limb.
Actions are performed slowly, very carefully. The pressure should be moderate. If everything was done without errors, a small amount of venous dark blood will be released from the dilator.
The needle is then secured with adhesive tape. Only after this is the tourniquet removed.
Connecting the system
At the final stage, the needle is connected to the system. All that remains is to monitor the condition of the animal and observe the puncture site.
Unforeseen circumstances and their consequences
Even with strict adherence to all rules, there is a risk of unforeseen situations. It is worth considering the most common ones in order to take the necessary measures in time.
The drug was administered incorrectly
A lump forms at the puncture site, the dog becomes restless and experiences pain in the affected area. Such problems often arise even with correct insertion: the animal periodically relaxes and tenses the veins, and the needle can come out.
For such problems, the lump can be injected with novocaine, but it is better to show your pet to a veterinarian to avoid negative consequences.
Allergy upon administration of the drug
The animal may develop an allergy to the administered drug. In this case, difficulty breathing occurs, lips and throat become swollen.
If such changes are observed during the procedure, you need to perform the following actions:
- Close the dispenser.
- Tighten the limb with a tourniquet. The main thing is not to clamp the paw for more than a quarter of an hour, monitor the pulse and temperature of the limb.
- Inject the leg with a solution of adrenaline (0.1%) or administer it intramuscularly. The dosage is calculated taking into account the weight of the animal.
Refusal to eat and drink after IV drip
With such changes, you need to constantly monitor your pet's condition. It is recommended to measure the animal’s body temperature, monitor its breathing rate and heart rate.
If all indicators are normal and the condition is improving, then you should wait a little. After this, the animal is given a warm drink.
If the condition worsens, you should contact a veterinary clinic.
What you need to know when placing an IV
When carrying out the procedure, many points must be taken into account, otherwise irreparable harm will be caused to the animal.
Solution temperature
The drug should not be hot or cold. The best option is a drug at room temperature.
What to do if your dog's temperature is low
If your pet’s temperature is below normal, part of the plastic pipe intended for transporting the solution should be placed in a container with water heated to +70...+80 °C. Due to this, the drug passing through the system will warm up slightly. This helps normalize the animal's body temperature.
Solution infusion rate
The speed at which the solution is administered deserves special attention. It is unacceptable for the drug to enter the body too quickly. No more than two drops should be poured per second.
As the speed increases, the dog’s condition can deteriorate sharply, resulting in:
- gagging;
- increased blood pressure;
- shiver.
Consequences of vein congestion
It is unacceptable for air to enter the vein, otherwise a gas embolism will develop.
Constant monitoring of the pet during the procedure
During the procedure, the pet must be under constant supervision. The owner’s task is to prevent the dog from running away and to promptly identify negative changes.
Conclusion
An animal should resort to installing an IV on its own, armed with all the necessary knowledge.
If mistakes are made during this procedure, the consequences may be irreparable..
Previous
Source: https://vashbarbos.ru/zdorove/procedury/kak-postavit-kapelnitsu-sobake.html
Types of infusion needles
When placing an IV, different games are used. They have a number of features. If you lack the skills, not all types can be used at home. This issue needs to be examined in detail.
Infusion disposable
Attached to the system.
They differ in thickness and length. For subcutaneous injection into the withers, a medium-thick long needle is used. For intravenous infusion, which is considered more traumatic, a needle of medium length and minimal thickness is used.
Butterfly needle
A short, fairly thin needle. In people it is injected into small veins. Suitable for small pets. It has a special design: “wings” made of plastic are placed in front of the expander. With their help, the needle is conveniently fixed.
Intravenous catheter
This is a plastic tube designed to be inserted into a vein. The drug enters through the catheter, and then the gateway is closed with a stopper.
It is worth knowing how many days such a needle can be used: it can remain in the vein for up to six days, but only with proper care of the puncture site.
Can all needles be used independently?
Not all needles are allowed to be installed on your own by a puppy or an adult dog.
The catheter must be inserted exclusively by a veterinarian . In the absence of experience, there is a risk of damage to nerve endings and veins.
How to put an IV on a dog?
I decided to write a detailed article on how to put an IV on a dog, especially for my friends, so that they would have a small and understandable guide, a manual, so to speak. Now, it seems to me that assembling the system is quite simple, but when I had to do it for the first time, everything did not work out as it should, either the solution did not want to drip, or on the contrary, it ran too quickly, in general, there were difficulties.
Let's learn from my past mistakes so as not to make our own and figure out how to properly assemble an intravenous infusion system, find out why and how to put an IV in a dog, what its benefits are.
Assembling our design
When you print the system, you will see a flexible transparent tube, on one side there is a needle or a plastic tip (depending on the manufacturer), this needle (tip) must be inserted into the bottle with the solution. As you can see in the photo.
insert the needle into the bottle until it stops
Often a dog has to be given an IV at home, so it is convenient to use improvised objects, such as a mop, stepladder, furniture, adhesive tape or electrical tape. You won’t be carrying a special tripod with you. In this case, I used the handle of the Orbitrek simulator.
At the other end of the tube there is a cuff or valve, made of soft rubber, into which, if necessary, drugs are injected, immediately behind it is a plastic cannula. The cannula has a standard size, so it fits needles from a disposable syringe or catheter.
we see a catheter with a connected system and a cuff
The system also has a dispenser - a plastic thing with a wheel. Before you fill the IV, move it closer to the end with the cannula so that you can easily adjust the slider during the procedure. Now move the wheel all the way to push the tube.
Now let's go back to the second image, you see here, in addition to the large needle, I stuck a small one so that air could enter the bottle, without it the solution will stop dripping. Let's remember school and physics.
But when you closed the valve, inserted the second needle, now press on the tube - this is a slight expansion as in the photo.
Special extension on the system
Now move the wheel on the dispenser little by little to completely fill the system with solution until it begins to flow out of the cannula. While assembling my first dropper, I did not turn off the dispenser and began to press the tube; as a result, air got into the system, which I was tormented to expel.
Move the wheel on the dispenser
Why is an IV needed?
We have already figured out how to put an IV on a dog, but it is not clear why it is needed. I couldn’t find a specific and understandable answer to this question on the Internet, maybe you’ll have better luck. In the meantime, I’ll write a few of my explanations.
If we give a general definition, then intravenous administration of fluid, the required salt composition, helps to avoid or “mitigate” a critical condition.
Let's give a few examples.
The puppy diarrhea and vomits every hour, pouring water through his mouth is pointless, it simply does not have time to be absorbed - dehydration develops.
The dog has been poisoned, we need to remove toxins from the blood as soon as possible, again an IV will help us.
Or another example: while walking you catch an infectious tick - piroplasmosis begins, as a result, red blood cells are destroyed, the blood thickens, toxins accumulate, and the gas balance of the blood is disturbed.
And with the help of intravenous infusions, we will quickly remove poisons, reduce blood viscosity, and normalize blood pressure.
Our actions will influence the functioning of the heart, it will become easier for it to pump blood, and if the heart is lighter, then other organs will receive more oxygen and nutrition. As we see, everything in the body is interconnected.
The dropper has a positive effect in many diseases; it often helps out in doubtful cases. We manage to save an animal that is in critical condition for unknown reasons.
Those people who came up with an intravenous infusion system and a catheter made the doctor’s work easier, and the owner can now independently administer an IV to the dog, thanks to them.
Fears associated with IV drips
Many people have fears associated with intravenous injections, the most common of which is air in the vein! What if an air bubble gets in during the injection, then the dog will die from an embolism. In fact, in order to kill an animal in this way, you need to introduce quite a lot of air, and into important vessels.
Several times I heard a terrible story about how a nurse put in an IV and forgot about the patient, the medicine ran out, and air went into the vein. Quite scary, but this will never happen because there is pressure in the blood vessels. You can put an IV on your dog and forget about it, the fluid in the system will drop to a certain level and stop dripping, that’s all.
We pierce the rubber cuff and inject the drug
The second phobia is associated with a blood clot in the catheter; people are afraid that the blood clot will break off and block the blood vessels of the brain or cause cardiac paralysis.
Yes, blood clots are dangerous if they are large or formed in the brain, but the clot in the catheter is very small. Also take into account the length of the path from the paw to the head; during the journey, the clot will have time to dissolve several times.
Blood clots form almost every day after a worm strikes or moves, so the body knows how to fight them.
Another phobia is associated with the installation of a catheter; people are afraid that a needle will stick out in the animal’s vein. But it’s not there, it’s only needed for puncture and insertion of the catheter. After installation, the needle (called a stylet) is removed and a thin plastic tube remains in the paw, which bends easily and does not cause harm.
To put a drip on a dog without consequences, you need
Most fears associated with intravenous injections are myths, but some rules should be followed.
Be sure to adhere to the speed of introducing solutions; it is better to drip slowly. On average 1-2 drops per second. If the dog begins to breathe rapidly or has convulsions, then you need to reduce the speed of the drip or stop it completely for a few minutes.
All administered drugs must be warmed up so as not to overcool the body, and warm solutions also reach their destination faster. If you are administering a small dose, then the vial or syringe can be immersed in warm water. But when you need to drip a lot and for a long time, this is especially true in the cold season - lower part of the system into a container with warm water, as shown in the photo.
Warm up the injected solution
Be sure to cover your dog. You will notice that your pet will be capricious and fidgety for the first 5-10 minutes, and then will doze off and begin twitching, snoring and may pass gas. This is a normal phenomenon; most dogs fall asleep and dream while on a drip, so do not be alarmed and do not confuse this condition with seizures.
About collecting and installing an IV for a dog
So, first you need to treat your hands with an antiseptic and put on sterile gloves. Next, you need to open the system and the bottle of medicine. There is no need to remove the entire metal cover from it - just its central part. Then you need to insert two intake needles into the rubber cap of the container with the medicine and fix the bottle upside down. At home, to hang a bottle of medicine, you will have to use improvised means - a mop, electrical tape, tape. The container must be secured at a height of 40-50 centimeters above the four-legged patient.
Next, move the dispenser lever all the way, make 2-3 smooth presses on the reservoir with the filter. He will draw the medicine into himself under pressure. Shake the chamber slightly to release excess oxygen. Lower the dispenser lever and watch the medicine go down. It is important that there are no air bubbles in the tube below the filter reservoir.
The dog must be prepared for the procedure as follows. The optimal place for infusion is the wide veins of the forelimbs, so you need to first shave or trim the hair between the pet’s wrist and elbow. Next, you need to pull the paw with a tourniquet above the puncture area. In dogs, the veins are clearly visible. We insert a needle into the vein, disconnecting it from the dropper, parallel to the paw. This must be done carefully and slowly. The pressure should be moderate. Next, the needle is fixed on the paw with an adhesive plaster, and the tourniquet is removed. Only then does the system join. So, now the process of infusion of medicine has begun, and the owner’s task is to monitor the dog.
It is important that the solution for administration is warm. It often happens that a properly inserted needle comes out of the vein because the dog tenses the muscle. To prevent this from happening, you must constantly monitor the progress of the procedure.
After placing a drip, dogs may, in rare cases, experience allergic attacks. They are manifested by difficulty breathing, coughing, swelling of the lips and throat. If the above signs appear during the procedure, then it is necessary to stop it by removing the needle. In this case, the dog’s paw is pricked with a 0.1% solution of adrenaline. The same medicine must be administered intramuscularly. It is better to call a veterinarian if the animal’s condition does not improve after an injection of adrenaline.
When receiving prescriptions from your veterinarian, find out in detail which drugs, in what sequence and at what speed (!) will need to be administered along with the main IV solution. Be sure to write down this information, do not rely on memory! If you have no experience at all, then the first few times, the drip should be done in a veterinary clinic, under supervision. Do not hesitate to ask questions to the staff, because the life of your beloved pet depends on your mistakes.
At home, the drip can be done either subcutaneously or intravenously. For intravenous administration, a catheter is placed on the dog's paw. The procedure for installing an intravenous catheter must be done only in a veterinary clinic!
An intravenous catheter needs proper maintenance and care. Before the next infusion, the outside of the catheter cannula must be treated with a disinfectant solution. The catheter should then be flushed. The fact is that in the intervals between droppers, the remaining blood in the catheter coagulates and forms a blood clot. Insert a syringe (not a needle!) into the cannula and try to suck out the clot into the syringe. At the end of the drip, to prevent the formation of a blood clot, it is necessary to fill the catheter with a mixture of heparin and saline from a syringe, thus creating a “heparin plug” that prevents blood clotting inside the catheter. Heparin is mixed with saline in a ratio of 1 ml. heparin per 40 ml. saline solution.
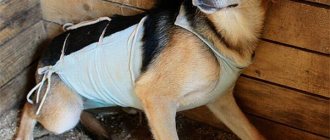
Prepare a site for the IV. Place a warm bedding and a diaper or piece of polyethylene under it. During the IV drip, the dog should not become hypothermic, so think in advance about how you can cover it.
The bottle with the solution should be located as high as possible above the animal, in no case at the level with the catheter! Wrap the bottle with tape and make a loop to secure it in a vertical position. Hang the bottle, for example, on the wall, with the stopper down.
Prepare: medications, syringes, drip system, alcohol, cotton wool, sterile wipes, bandages, scissors and ampoule cutter, doctor's prescription.
Fill the syringes in advance as directed by your veterinarian, releasing any air bubbles, and cover the needles with protective caps.
Wipe the lid of the bottle with alcohol and insert the needle of the drip system until it stops. Insert an air needle nearby and open its cap.
Squeeze the dropper several times until the solution fills it by one third. Slide the clamp wheel up until it stops, thus opening the flow of fluid into the system. Allow the solution to fill the system until all air bubbles are removed.
It is unacceptable to administer intravenous fluid if there are air bubbles in the system.
Move the clamp wheel all the way down (close the flow of solution). Now everything is ready. Place the dog in the prepared area. Unbind the paw and, after removing the plug from the catheter, rinse it. Attach the drip system to the catheter, slide the clamp wheel up and adjust the speed of solution administration according to the doctor's instructions.
Inject medications from a syringe with a needle into the rubber part of the system. Strictly follow the sequence, dosage, and rate of administration recommended by your veterinarian.
Never leave your dog unattended for a second! Talk to her kindly, try to calm her down in every possible way. As a rule, after administering the solution, the dog quickly falls asleep.
If the animal becomes noticeably nervous, this may mean that the IV speed is too high. In this case, reduce the speed and let the dog rest for a while.
When the drip is complete, close the clamp and disconnect the system. Fill the catheter with heparin and close it with a sterile stopper flushed with the same heparin. Bandage the paw tightly.
If the IV does not drip, then the catheter may be bent inside the vein or malfunction. Try to find a position for the dog's paw that will allow you to complete the procedure. Otherwise, replace the catheter in the clinic. Administering the drug from a syringe instead of a dropper is dangerous, since a faulty catheter could jump out of the vein and get under the skin.
Monitor the condition of the skin around the catheter and if you notice swelling, stop the IV.
Infusion therapy (or IV therapy) is considered one of the most effective ways to administer fluid to a patient, be it blood, water, or medicine. Inserting an IV is a skill that everyone working in the medical field must master.
Method 1 of 3:
Preparing everything you need Edit
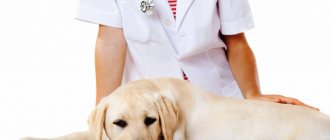
Unfortunately, most of us have had to deal with illness in a pet. The animal will not say what and where it hurts, so it often comes to the veterinarian in critical condition. The fastest and most effective way to administer the necessary medication to a patient is through infusion therapy. Therefore, the doctor often uses droppers to quickly help the animal and alleviate the symptoms of the disease.
Treatment with IVs
often used to administer antibiotics or saline. Usually the treatment is scheduled for several days, that is, one procedure is not enough. If it is not possible to visit the veterinarian every day for the procedure, then an IV is placed at home.
How to properly place an IV at home, how to place a catheter in a dog?
Placing a catheter is more difficult than simply injecting the drug into a vein. It happens that not every veterinarian succeeds in placing the catheter correctly the first time. Therefore, before you start using it, you need to know a few rules:
- The catheter requires careful care: after each use it must be thoroughly rinsed and dried.
- If the catheter is placed for a long time, you need to make sure that the animal does not start licking it: it can come off. During injections using a catheter, you need to be close to your pet and make sure that the catheter is positioned correctly at all times.
- When any drug is administered into a vein, there may be a risk of various bacteria and fungi entering the blood. To prevent this from happening, you need to thoroughly disinfect the injection site and ensure that the catheter is sterile.
- To prevent the animal from unwittingly removing the catheter, you can bandage it with a bandage for greater confidence - this will make it much more difficult to remove the device.
When should an intravenous catheter be used in dogs and cats?
- Emergency conditions, resuscitation, operations that require quick access to the bloodstream (for example, if you need to administer drugs urgently and at high speed).
- Hospitalization of an animal with seizures.
- Prescribed parenteral nutrition.
- Overhydration or hydration of the body.
- Transfusion of blood products (whole blood, packed red blood cells).
- Repeated or continuous administration of drugs intravenously.
- The need for rapid and accurate administration of the drug in an effective concentration (especially when the drug can change its properties when taken orally).
How to choose a catheter for your pet
When choosing a catheter, the following factors must be considered:
- catheter size: the larger its size, the faster the rate of drug administration;
- vein diameter: the diameter of the catheter should not exceed the diameter of the vein;
- time of use of the catheter: it cannot be used for more than three days;
- material from which the device is made: it is best to purchase Teflon polyurethane catheters - their service life is much longer with proper care.
How to install an IV yourself: practical recommendations
To do this, carefully unscrew the white plug, fixing the catheter with your fingers. If there is blood when opening, do not be alarmed - this is only evidence that there is no blood clot there.
Next, take the edge of the dropper that ends with an elastic band with a plastic tube and carefully insert it into the catheter. Make sure that the system is tightly connected to the catheter. There shouldn't be a needle at this end!
Now you can open the system by lifting the speed control wheel up. The rate of administration of the drug should be adjusted according to the instructions of the veterinarian.
How to choose a vein for injection with a catheter
The catheter can be placed in any large superficial vein, soft and elastic, without knots or seals. But most often the cephalic vein, the medial and lateral vein of the safen are used for this purpose.
The lateral vein of saphena in dogs is more accessible for injections than in cats, so most often dogs have a catheter placed in this vein. For cats, it is easiest to insert the device into the medial vein of the saphen.
The catheter can be placed in any large superficial vein, soft and elastic, without knots or seals. But most often the cephalic vein, the medial and lateral vein of the safen are used for this purpose.
If your pet has diarrhea or urinary incontinence, it is not recommended to insert a catheter into their hind leg - this will add problems with the sterility of the device, which must be kept clean at all times.
For intravenous injections, it is better to place a catheter in peripheral veins.
Catheter composition
The catheter includes five components:
- Valve – for drug administration. As a rule, it is multi-colored.
- A stiletto is a piston with a needle.
- The final part of the stylet is removed after installation of the catheter.
- The cannula is the final part of the stylet. An injection system or a syringe without a needle is connected here.
- Cannula Cover - Screws onto the end of the catheter to cover the entrance to the vein.
If your pet has diarrhea or urinary incontinence, it is not recommended to insert a catheter into their hind leg - this will add problems with the sterility of the device, which must be kept clean at all times.
Preparing your pet for catheter installation
Before installing a catheter, several conditions must be met:
Source: https://PitomnikDofbali.ru/baza-znanij/kak-vvodit-lekarstvo-v-kateter-sobake.html
Intravenous injection
Intravenous injections are often prescribed when severe illnesses are detected. Such procedures can be carried out while the animal is unconscious. When the medicine is administered directly into the circulatory system, the absorption of the active components of the medicine improves and the speed of onset of the therapeutic effect increases.
Intravenous injections are a complex procedure. The person must not only get into the vein, but also keep the needle there until the medicine is completely administered. Many solutions for such injections are extremely irritating to soft tissue. And if they get into a muscle or under the skin, a dangerous inflammatory process appears in this place.
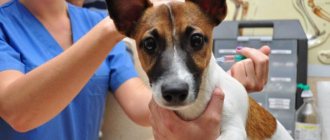
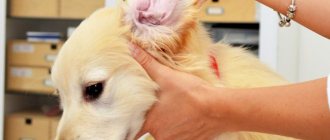
The veterinarian usually gives an injection in the forearm area. Before this, he cuts the hair there and disinfects the puncture site. The needle is inserted with the point up, carefully piercing the skin and then the wall of the vein. If the hit is successful, dark venous blood enters the syringe. Next, the doctor advances the needle a few more millimeters and gently presses on the piston.
After administering the medication, the veterinarian compresses the puncture site with a sponge soaked in antiseptic. He carefully removes the needle, continuing to wipe the hole with cotton. This action prevents the development of hematoma.
We put an IV on the dog at home. Step-by-step instructions and video
The first thing an owner sees when looking for information on how to place an IV in a dog is “this is a clinical procedure, contact a veterinarian.”
Quite logically, a dropper involves intravenous administration of the drug, less often, subcutaneous administration, which means you will have to correctly insert the needle into the dog’s vein.
If you don't have any medical skills, this is a really risky undertaking, the first principle of treatment is do no harm!
So, your pet is in critical condition, there is no veterinary clinic nearby, doctors cannot be found either, and you can no longer put off help - there is no way out! You will have to give your dog an IV at home.
How to insert or remove a catheter for a dog or cat at home?
If they are not given immediate help, they will die. And we, ordinary people, lack the skills and abilities to provide the necessary assistance. Many diseases require serious attention that there is a need to give IVs, but it is not possible to visit a doctor.
But if you prick a dog or cat every day, then there will be no living space left on them. Therefore, an intravenous catheter becomes a great help, with the help of which you can make both a drip and an injection at any time.
What a pet owner needs to know about catheters
Placing a catheter is more difficult than simply injecting the drug into a vein. It happens that not every veterinarian succeeds in placing the catheter correctly the first time. Therefore, before you start using it, you need to know a few rules:
- The catheter requires careful care: after each use it must be thoroughly rinsed and dried.
- If the catheter is placed for a long time, you need to make sure that the animal does not start licking it: it can come off. During injections using a catheter, you need to be close to your pet and make sure that the catheter is positioned correctly at all times.
- When any drug is administered into a vein, there may be a risk of various bacteria and fungi entering the blood. To prevent this from happening, you need to thoroughly disinfect the injection site and ensure that the catheter is sterile.
- To prevent the animal from unwittingly removing the catheter, you can bandage it with a bandage for greater confidence - this will make it much more difficult to remove the device.
Device for drip administration of drugs
Such medical devices are sold in complete sets in pharmacies. The intravenous infusion system consists of the following components:
- Flexible tube.
This is the main part through which the medicine passes out of the container. - Fence needles.
There are two of them in the set. The first one is connected to the tube. The second is equipped with an expander for air flow into the container with the drug. - Dispenser.
It is a plastic box with a slider (wheel) and is intended to regulate the speed of supply of medicinal liquid. - Camera.
This is a transparent plastic container with a filter inside that prevents oxygen from entering the tube and into the blood. - Cannula.
This is the name of a device for introducing additional drugs into an infusion solution. The cannula looks like a rubber or plastic pad equipped with a valve for the needle.
About choosing a needle for procedures
Infusion needles are devices that are attached to the system. If we are talking about subcutaneous injection of drugs into the withers, then long needles of medium thickness are used. They are used, for example, to eliminate dehydration and infuse saline.
Intravenous administration of drugs is more traumatic. This requires the thinnest needles of medium length, for example, “butterfly” is used to infuse medications into the small veins of small breed dogs. It got its name thanks to the plastic “wings” that allow it to be fixed to the paw.
Intravenous catheters are plastic tubes that are inserted into a vein. They can stay in it for 5-6 days with proper care.
Criteria for choosing a vein and catheter for dogs and cats
The lateral saphen vein is more accessible in dogs, whereas in cats it is easier to insert a central catheter through the medial saphen vein. Catheters inserted into the hind leg are more difficult to keep clean and are not recommended for patients with urinary incontinence or diarrhea.
With intravenous injections, the advantage remains with the peripheral veins. The veins should be soft and elastic, without compactions or knots. It is better to inject drugs into large veins, in a straight section corresponding to the length of the catheter.
- Vein diameter (the diameter of the catheter must be less than the diameter of the vein).
- Required speed of solution administration (the larger the catheter size, the higher the solution injection rate).
- Potential time the catheter remains in the vein (no more than 3 days).
Preparing dogs and cats for peripheral catheter placement
- Lay out a clean diaper or sheet (it is ideal if you iron or steam it with an iron).
- Lay down and calm your pet.
- Shave the fur where you are going to place the IV.
- It's better if it's a paw. In any case, the location will be determined by the veterinarian.
- The animal's paw should be straightened so that the vein is not pinched. You can fix it (the paw) with a splint - a board bandaged to the paw.
- The puncture site is disinfected.
How to give a subcutaneous injection at the withers
The subcutaneous fat layer is penetrated by many small blood vessels. Therefore, after injection, the medicine penetrates the circulatory system slowly and evenly. Subcutaneous injections allow you to avoid pressure surges, a sharp immune reaction, and severe pain. They are recommended for the treatment of adult dogs, puppies, pregnant and weakened animals.
The best place for subcutaneous injections is the withers. This is the name of the skin between the shoulder blades. It is designed by nature to carry puppies with the teeth, as well as for protection during fights with other predators. Rough, insensitive skin allows you to give an injection painlessly. But at the same time, an inexperienced owner can break or bend the syringe needle.
The algorithm for subcutaneous administration of the drug is as follows:
- draw the drug into the syringe;
- pinch the skin into a fold and pull it upward;
- make a puncture with a needle at an angle of 45 degrees;
- slowly inject the medicine while pressing down on the plunger.
Make sure that the needle does not pierce all the way through the fold. Then the medicine will not get into the fat layer. Remember, the dog is not given a subcutaneous injection in the area under the collar, so that the puncture site does not become injured, dirty or inflamed.
ᐉ How to properly place an IV at home, how to place a catheter in a dog? – zoomanji.ru
The first thing an owner sees when looking for information on how to place an IV in a dog is “this is a clinical procedure, contact a veterinarian.”
Quite logically, a dropper involves intravenous administration of the drug, less often, subcutaneous administration, which means you will have to correctly insert the needle into the dog’s vein.
If you don't have any medical skills, this is a really risky undertaking, the first principle of treatment is do no harm!
So, your pet is in critical condition, there is no veterinary clinic nearby, doctors cannot be found either, and you can no longer put off help - there is no way out! You will have to give your dog an IV at home.
We put an IV on the dog at home. Step-by-step instructions and video
The first thing an owner sees when looking for information on how to place an IV in a dog is “this is a clinical procedure, contact a veterinarian.”
Quite logically, a dropper involves intravenous administration of the drug, less often, subcutaneous administration, which means you will have to correctly insert the needle into the dog’s vein.
If you don't have any medical skills, this is a really risky undertaking, the first principle of treatment is do no harm!
So, your pet is in critical condition, there is no veterinary clinic nearby, doctors cannot be found either, and you can no longer put off help - there is no way out! You will have to give your dog an IV at home.
How does the drug drip system work?
The pharmacy sells a complete system for intravenous infusions, consisting of the following parts:
- The flexible tube is the main part, through which the drug descends from the container with the medicine to the needle.
- Intake needles (2 pcs.) – both are inserted into the rubber cap of the container with liquid for infusion. One needle is attached to the tube, the second with an expander - for the flow of air into the bottle with the medicine.
- The dispenser is a plastic box with a wheel or slider. Refishes the tube, adjusting the speed at which the liquid falls.
- The chamber - a container made of soft transparent plastic with a filter inside - prevents oxygen from entering the tube and, accordingly, into the blood.
- A cannula is a device for introducing additional medications into an infusion solution; it may look like a rubber pad or a plastic container. Equipped with a valve for a standard needle.
Note! Droppers with a reservoir (bag) for liquid are equipped with a valve for air intake, that is, the bag does not need to be pierced with a second needle.
Dropper device
The dropper consists of several parts. Table 1. Dropper design, explanation of symbols.
| The number in the photo | Component name | Purpose of the component |
| 1 | A needle that is inserted into a vein | The size depends on the type and age of the animal. For a kitten and a puppy, use the thinnest, “insulin” needles |
| 2 | Drop former | A vacuum process occurs inside the container, under the influence of which the liquid is sucked inside |
| 3 | Regulating device | Allows you to regulate the rate at which medication enters the body |
| 4 | Plastic tubes | Vessels through which fluid moves to the needle |
Choosing a needle for infusion
- Infusion needles are disposable - in fact, these are exactly the needles that are attached to the system.
They vary in length and thickness. For subcutaneous injection into the withers, for example, saline solution for dehydration, a long needle of medium thickness is used. Intravenous administration is more traumatic; you will need the thinnest needle of medium length.
- A disposable butterfly needle is thin and short, in human medicine it is used for insertion into small veins, that is, it is suitable for small dogs.
In front of the expander, there are plastic “wings” that can be conveniently fixed by bending them to the paw.
- An intravenous catheter is a plastic tube that is inserted into a vein. The drug is administered through a catheter, after which the gateway is closed with a stopper. With proper care, the device can remain in the vein for 5-6 days.
Note! The catheter is installed only by a veterinarian, without experience, you can seriously damage the vein and nerve endings of the animal’s paw!
Dropper assembly
The procedure for assembling the system is as follows:
- Wear gloves and treat your hands with antiseptic.
- Prepare a bottle of medicine and hang it on a tripod.
- Check your doctor's prescription: often the dropper is a saline solution to which other components are added.
- If necessary, open the ampoules with medications, draw the contents with a syringe and inject them into the sodium chloride solution.
- Print out the system for installing the dropper.
- Find the plastic tube and the regulator on it - it needs to be moved to the closed position. This is not difficult to do - the tube will seem to be pinched.
- Insert the needle into the cap of the bottle or a special hole in the bag with the injected solution.
- Remove the extra needle from the package and insert it next to the main one to prevent a vacuum from forming.
- Find a cylinder-shaped extension on the plastic tube. Press it several times - it is necessary that it is filled with the medicine to about half. Using this cylinder you will determine the rate of introduction of the solution.
This completes the first stage of preparation.
Preparing a dog for placement of a peripheral catheter
- Lay out a clean diaper or sheet (it’s ideal if you iron or steam it with an iron),
- Lay down and calm your pet,
- Shave the fur where you are going to place the IV,
- It's better if it's a paw. In any case, the location will be determined by the veterinarian,
- The dog's paw should be straightened so that the vein is not pinched. You can fix it (the paw) using a splint - a board bandaged to the paw,
- The puncture site is disinfected and the veterinarian inserts a catheter.
The doctor will connect the IV to the catheter for the first time, but in the future your actions will look like this:
- Remove the needle (4) from the dropper system and place it in a sterile napkin.
- With your left hand, holding the catheter on the animal’s paw, you need to unscrew the white cap on it. If blood appears in the catheter, it means the catheter is functioning.
- While continuing to hold the catheter, the plastic end of the dropper (4) without a needle is inserted into the place where the white cap was unscrewed.
- To prevent the cap from being lost or sterilized, it must be screwed to the coupling removed from the dropper and the needle. Place the needle in a sterile napkin.
- Now you need to open the speed regulator for introducing the solution and adjust the speed so that no more than one drop drips per second.
- After completing the transfusion, close the dropper by turning the wheel until it stops.
- If there is a need to additionally introduce another medicine, then use another syringe with a needle to puncture the node for additional injections (5) and inject the medicine.
- In order for the catheter to remain working, it must be rinsed with saline (5-10 ml slowly through the node (5))
- Take a cap from a sterile napkin.
- After removing the cannula from the catheter, screw on the cap.
- Use a sterile bandage to secure the catheter on the paw until next time.
When giving an IV to a dog, you must remember
- IV solutions should be warm or at room temperature.
- If
Many pet owners who have never injected themselves, even themselves, are forced to learn how to do it because the need arises. When a dog gets sick, and the veterinary clinic is far away, and it is not possible to visit it every day, it is easier and calmer for the owner to learn how to do all the medical procedures himself. The disease of a tailed friend will simply force you to learn how to put an IV. So, let's arm ourselves with useful information.
Unforeseen circumstances and their consequences
Even with strict adherence to all rules, there is a risk of unforeseen situations. It is worth considering the most common ones in order to take the necessary measures in time.
The drug was administered incorrectly
A lump forms at the puncture site, the dog becomes restless and experiences pain in the affected area. Such problems often arise even with correct insertion: the animal periodically relaxes and tenses the veins, and the needle can come out.
Allergy upon administration of the drug
The animal may develop an allergy to the administered drug. In this case, difficulty breathing occurs, lips and throat become swollen.
If such changes are observed during the procedure, you need to perform the following actions:
- Close the dispenser.
- Tighten the limb with a tourniquet. The main thing is not to clamp the paw for more than a quarter of an hour, monitor the pulse and temperature of the limb.
- Inject the leg with a solution of adrenaline (0.1%) or administer it intramuscularly. The dosage is calculated taking into account the weight of the animal.
Refusal to eat and drink after IV drip
With such changes, you need to constantly monitor your pet's condition. It is recommended to measure the animal’s body temperature, monitor its breathing rate and heart rate.
If all indicators are normal and the condition is improving, then you should wait a little. After this, the animal is given a warm drink.
If the condition worsens, you should contact a veterinary clinic.
What you need to know when placing an IV
When carrying out the procedure, many points must be taken into account, otherwise irreparable harm will be caused to the animal.
Solution temperature
The drug should not be hot or cold. The best option is a drug at room temperature.
What to do if your dog's temperature is low
If your pet’s temperature is below normal, part of the plastic pipe intended for transporting the solution should be placed in a container with water heated to +70...+80 °C. Due to this, the drug passing through the system will warm up slightly. This helps normalize the animal's body temperature.
Solution infusion rate
As the speed increases, the dog’s condition can deteriorate sharply, resulting in:
- gagging;
- increased blood pressure;
- shiver.
Consequences of vein congestion
It is unacceptable for air to enter the vein, otherwise a gas embolism will develop.
Constant monitoring of the pet during the procedure
During the procedure, the pet must be under constant supervision. The owner’s main task is to prevent the dog from running away and to promptly identify negative changes.