If you keep an aquarium at home, then you probably know how difficult it can be to keep your fish house in good condition. This is especially true for already old or damaged aquariums, which can easily become broken.
The cause of the leak can be anything, but in any case the problem lies in the sealant that glues the glass walls together. Over time, it can lose its properties and begin to crumble, which leads to a leak in the aquarium. Sometimes the owners themselves break this tightness when they scrape off algae in the same place in the aquarium.
However, container damage is easy to fix, and if desired, this can be done even at home.
How to fix a leak
To do this, you need:
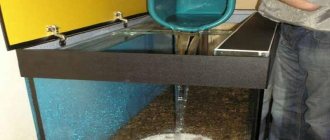
- Lower the water level below the leak. Remove the filter and other interfering elements.
- Find the corner where the water is leaking and use a blade to cut off the old sealant from this place.
- Degrease the leak area with acetone or alcohol from the outside.
WARNING: Do not perform this procedure on the inside of the glass as you are working with toxic liquids. If they subsequently end up in the water with the fish, it will harm your inhabitants.
- Dry the treated area and apply a layer of special sealant to it.
- After 24 hours, when the silicone has gone through the vulcanization stage, carefully clean the seam.
- Now you can increase the water level.
If the leak occurs at the top of the container, you can lubricate only the damaged area. But if the sealing failure occurs at the bottom, then it is better to seal the entire aquarium.
IMPORTANT: If the aquarium is large, it is recommended to lubricate it every five years.
Aquarium leak
Of course, if you notice that the aquarium has started to leak or there is phlegm on the seams. In this case, it is necessary to conduct a thorough inspection of the aquarium and find the cause of the moisture. It's very easy to do
Take a piece of soft toilet paper, preferably darkish, so that moisture is immediately visible on it, and blot it (not with a paper swab), along the seams of the aquarium, to identify the seam that has begun to let moisture through. Do not rush to rejoice if you see a point of water oozing from the bark, it does not mean at all that it is located in the aquarium opposite the place where you found it, on the outer wall of the aquarium. When making an aquarium, the technology of filling the corners of the aquarium with silicone (silicone “kerchiefs”) is very often used, so water can penetrate under the silicone in one place, flow between the layers of silicone in the seam and flow out in a completely different place. Therefore, repairing the “wetting point” is very ineffective.
Glue sealant for aquarium
In the production of frameless aquariums, special silicone glue is used. When a breakdown or seal failure is repaired at home, you need to buy exactly the same glue.
It looks like a jelly-like mass that hardens when exposed to moisture in the air. 30 minutes after gluing the damaged area, the polymerization process occurs. And after only a day, the glued area is almost impossible to damage, since the seam completely interlocks the two edges of the glass and forms one common surface, similar to the original glass. This effect is achieved thanks to silicon, which is part of the silicone adhesive and the glass itself.
This glue can be purchased at some pet stores and at any construction hypermarket.
IMPORTANT: When choosing silicone glue, look on the packaging for the words: “For aquariums” or “For gluing aquariums.” This option is the best.
Brands such as Soudal, VIK Aquarium Silicone and Penosil are most optimal for your situation. These brands are safe, and the components included in the glue will not harm the fish. Also, the glassy mass can harden to the state of glass.
Is it possible to seal a crack in the bottom of an aquarium?
Jenshen
even a crack from edge to edge can be properly sealed... especially at the bottom... if the aquarium is glass, choose a new piece of glass 15-20cm wide so that it completely covers the length of the crack, buy regular silicone (but the packaging should show an aquarium or say that it is suitable for gluing an aquarium), fill the crack with silicone and cover it with a piece of glass…. let it sit for 4-6 days... then soak it for a week (drain the water twice a day and refill the aquarium again) it should work
Oleg Khala
In general, it is possible, there are many ways. For example: you need to make a groove out of plasticine along a crack and pour liquid glass into it, remove the plasticine after hardening. Take a narrow strip of glass or plastic along the length of the crack, coat it with superglue or any other strong glue and apply the strip to the crack. Naturally, everything is done on dry and grease-free glass.
oleg
I would replace it!! and the crack can be sealed with silicone, but in order to sleep peacefully and not think about the crack, buy a new aqua .. good luck .. and from now on, place a sheet of foam under the bottom of the aquarium, it will even out the unevenness on the surface of the table where the aqua sits...
Gluing aquarium glass
Bonding occurs in cases where the glass is cracked. How to proceed depends on the size of the crack and its location. For example, if a breakdown occurs in the upper part of the aquarium, then the crack is sealed with silicone.
If the glass is damaged along the entire vertical, horizontal or diagonal of the container, then the repair will not tolerate delay. Here you need to work quickly, since glass with such a crack may not withstand water and burst.
To properly carry out the restoration, it is necessary to divide the entire repair process into several stages.
Stages of work
- Find the exact location of the leak. If there are no traces of cracks or chips on the glass, then take the paper and apply it to the glass. Where the water flows, the paper will immediately become damp.
- Disassemble a cracked aquarium: for a frameless one, you need to make neat cuts inside and outside in the joint area; For a frame one, you need to remove all the sealant from the gap.
- Any adhesive that became accessible after disassembly must also be removed.
- Using the template, cut out the new glass. You can order it from the workshop.
- Using silicone glue, coat all the joints of the disassembled aquarium and the ribs of the new glass.
IMPORTANT: You must carefully monitor the amount of sealant: if you see that it is not enough, then very carefully add it to the desired area.
- Secure the position with tape or another structure.
- After an hour, seal the seams again - this way you will secure the result so as not to seal the container again.
- After one day, you need to check the restored aquarium for strength. To do this, pour water into it and let it stand for 2 hours.
- You can also use paper by placing it on the joints. If the place is just as dry, then you can be congratulated on a job well done!
- If there are no problems, you can drain the temporary water, add soil, you can immediately add fertilizer and prepare the aquarium for stocking.
Aquarium glue. How to glue an aquarium?
Having an aquarium at home is very useful. According to psychologists, watching fish helps a person calm down and relax. And the sight of colorful, beautiful fish moving quickly around the aquarium is always a joy!
Today the pet products market is quite diverse. Therefore, novice fish breeders most often purchase a ready-made aquarium. But experienced aquarists, as a rule, prefer to make them on their own. After all, this is how you can achieve the desired size and volume.
Choosing glass for an aquarium
In order to glue an aquarium yourself, you must first of all prepare the necessary materials.
It is better to order glass from a workshop, because the cutting is performed there by a machine (the cutting accuracy in this case is higher). When ordering, be sure to specify that the glass you need is specifically for an aquarium. It should be silicate, only the highest grade and 8-10 mm thick, since anything thinner may not be strong enough and cannot withstand water pressure.
All glass is divided into 2 groups - window and polished. The former have a more affordable price, but they cannot be used for making aquariums. The characteristic waviness and greenish tint will have a negative impact on the appearance of the finished product. Polished glass has no such disadvantages; it provides a perfectly smooth surface.
Assembly methods
Before gluing the aquarium, you should choose an assembly method. There are two of them:
- The vertical sides are installed on the bottom. This is how small aquariums are glued together, but this method is rarely used.
- The walls are glued around the bottom. This method ensures the strength and reliability of the finished product.
Aquarium glue
Gluing an aquarium yourself requires choosing the right adhesive. It must contain silicone.
When choosing, you should carefully study the packaging. Aquarium glue must be designed specifically for this product. It should not contain antibacterial substances that are harmful to fish and plants.
Glue for aquarium glass can be of several colors:
- colorless;
- white;
- black (looks great in large aquariums).
For those who are gluing a product for the first time, it is better to choose transparent aquarium glue (waterproof). For ease of use, it is recommended to purchase a special gun that helps squeeze out the product.
Silicone sealants are considered the most versatile product. Their advantages:
- long service life;
- elasticity;
- the product provides reliable adhesion to any surface;
- silicone is easy to use;
- non-toxic;
- does not emit harmful substances.
In addition, aquarium glue hardens quite quickly, in just 20 minutes, and within a day the polymerization is completely completed. The seams are very durable. At the same time, silicone retains its elasticity. Before using the sealant, make sure that the surfaces to be treated are clean, dry and grease-free.
In addition to silicone, you can use epoxies. However, they are more fluid, harden for a long time and require more thorough cleaning of the surface.
Easy to use cold welding. This product is chemically inert and sets in a few minutes.
Cyacrines are also good, only when gluing the aquarium there should be small gaps between the parts.
If you cannot find an aquarium sealant, you can purchase a product that is intended for water pipes or dishes. Only it should not contain antifungal additives.
Gluing the aquarium
The work is carried out in several stages:
- To protect the glass from contamination, they are covered with masking tape. From each edge leave a distance equal to the thickness of the glass.
- All surfaces are degreased - wiped with an acetone-containing product or alcohol.
- The glue line should be made as smooth as possible. To do this, you need to apply a little silicone to the end. After hardening, cut it off with a blade, leaving a small protrusion above the glass. It will help to create a uniform seam.
- Gluing is carried out on a hard and flat surface covered with polyethylene. First, the glass that will be located in the front is glued, then the side and all other parts. Excess aquarium glue from the glass should be removed with a cloth previously moistened in a solution of water and vinegar.
- After about an hour, the seams should be coated with silicone and the product should be left to dry. The aquarium is ready for use.
fb.ru>
Where to put the fish during repairs
It is obvious to assume that during repairs the fish must temporarily leave their home. But how to do that? Very simple:
- If you have another aquarium, then move them to it.
- If there is no other large container, then choose another smaller place that would accommodate your pets. If the volume allows, then you can even take an ordinary glass jar.
- It is better to pour water from the damaged aquarium into a temporary shelter.
- Be sure to remove the soil and all plants from the broken aquarium; if possible, they can also be transferred to a temporary home for the fish.
- Since fish need oxygen, provide it to them.
Repairing an aquarium at home is not a difficult task if you approach the repair process rationally. In order to accurately and effectively “patch up” a house for your fish, you just need to figure out what materials should be used and what tips to follow.
With a little patience, time and perseverance, you will save on buying a new aquarium and see for yourself that it is much easier to learn how to restore glass yourself.
How to care for a freshwater aquarium
To avoid having to learn how to seal an aquarium, you need to consider the rules for caring for it.
In order for the fish to live comfortably, it needs to be properly cared for. There are several simple rules that will help owners improve the quality of life of their pets. First of all, it needs to be cleaned regularly. This process consists of cleaning the glass, washing the soil and all decorative parts. You should also check from time to time the correct operation of all systems without which the fish cannot live. This includes all kinds of filters, oxygen supply system, lighting and heating. Another important point is frequent water changes. The final stage is to check all the plants and animals that live in it. This step may include feeding and adding appropriate micronutrients to the water. From all of the above, we can conclude that caring for an aquarium requires accuracy, painstakingness and attentiveness. In addition to the fact that a person must have enough time to carry out all these manipulations, he must also have some knowledge in this area. Because of this, many people refuse to install aquariums in their home. However, do not rush to deny yourself this pleasure, because today there are many companies that can help you service it. By the way, they certainly know how to seal it at home if you can’t deal with the problem yourself.
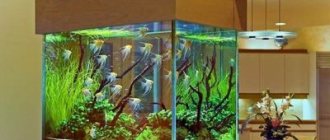
One of the most unusual interior decorations is the installation of an aquarium. In addition, the presence of fish in the living room helps the owners relax and unwind after a hard day at work. The big advantage is that such pets do not require as much care and attention as cats or dogs. This is why aquariums can be placed in offices, restaurants and other public places to add variety to the environment. Situations often occur when the aquarium leaks; we have discussed what to do in this case, so this problem should not frighten aquarists.
How to wash properly
For effective cleaning, it is important to learn how to properly wash your aquarium. Cleaning consists of several stages
Each one does a specific job.
Removing plaque from glass
Experienced fish farmers advise starting cleaning with glass. All dirt cleaned from the walls settles to the bottom. After this, you won’t have to wash it twice:
- First, the algae that interferes with the view is removed.
- The walls are processed using a scraper.
- Every surface is carefully processed. It is not recommended to leave residual dirt.
When cleaning, it is important to move the scraper from top to bottom. Movements should be smooth and careful
As a result, all dirt should settle to the bottom.
Cleaning decorative elements and stones
Simply put, this is cleaning the bottom and all the items that are there. They are not taken out of the aquarium and replaced. Cleaning is carried out inside the container. A gravel vacuum and suction siphon are used to remove dirt.
Thinning
The purpose of this stage is to remove leaves, shoots and branches of algae that have been damaged by fish and snails. They also get rid of branches that have grown greatly. Plants interfere with each other, as well as with aquarium inhabitants.
If shrimp live in a glass structure, weeding should be done as little as possible. Whimsical individuals are especially sensitive to this. When removing bushes with roots, act carefully so that a lot of turbidity does not rise from the bottom.
Removing rotten leaves
If they remain in the aquarium for a long time, they can cause slippery deposits and dirt to appear. Leaves are trimmed in water. This is done using treated scissors.
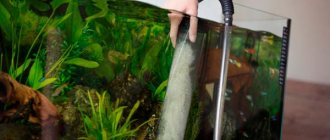
Siphonka
Great care must be taken when pumping out water. The process requires maximum attention so that fish and other small inhabitants of aquariums do not disappear along with dirty waste.
Partial drain
After weeding the bottom and cleaning the walls of the aquarium, a large amount of turbidity rises from the bottom. Water with remaining dirt must be drained. Only dirty water is drained, starting from the dirtiest places.
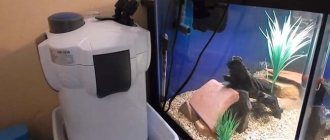
Cleaning and washing filters
The device is pulled out of the water and cleaned on its own. To do this, use a brush, even a toothbrush will do. The filter is washed according to the instructions specified by the manufacturer.