Kinds
There are two types - external and internal. Each type differs in quality, appearance and structure.
The external background is a film with decorative elements applied to it. The film sheet is most often found in the design of the back wall. Among the advantages are:
- Low price.
- High assortment in specialized stores.
- Easy to install, as well as easy to change the sheet if it is damaged.
Background film
There are aquarium backgrounds of the same type, but with a three-dimensional 3D image. Installed on the back wall. Unlike a regular film sheet, the price is slightly higher.
The interior background is a relief decor of an aquarium. Its choice should be approached with extreme caution, since some elements are made of toxic materials. When purchasing or making, pay attention to the size of the decoration. If the dimensions of the sheet do not match the wall of the aquarium, it will not be possible to install it.
The main feature is its appearance. It looks picturesque and creates an effect of depth in the aquarium. The disadvantages are the high price and standard sizes that are not suitable for all aquariums. And also the decorations need to be promptly cleaned of algae that accumulates on them.
Homemade backgrounds
Making a background for an aquarium directly depends on the selected materials, as well as on the ideas of the aquarist. When creating, you can use building materials, acrylic paint, or simply live aquarium plants.
Background made from selected materials
There are many options for creating a background. The main requirement is the choice of non-toxic materials that can harm the inhabitants of the aquarium. This method is suitable for people with non-standard sizes of home tanks, since volumetric backgrounds for aquariums from pet stores are made mainly of the same size. Let's consider several ways.
Method 1
To create a decoration from foam plastic with your own hands you will need:
- Acrylic paint.
- Foam sheet.
- Stationery knife.
- Silicone glue.
- Tile adhesive.
- Brush.
Foam background
During operation, adhere to the following procedure:
- The foam sheet is broken into uneven pieces and glued together based on the area of the back wall of the aquarium.
- In order for the background to look natural, you need to clean the sides of the foam with a utility knife. The shape of the decoration can be chosen arbitrarily, according to your taste.
- Cover the glued pieces with tile adhesive in several layers, and after drying, cover them with acrylic paint using a brush. The dried slab should be painted with a thin layer of dark paint. To make the stones look more realistic, it is advisable to use intermittent strokes when painting.
- Dry the structure and fill it with water for two days in order to clean it of harmful impurities.
- Secure to the inner wall with silicone glue.
Method 2
To make the next aquarium background you will need:
- Polyurethane foam.
- Polyethylene.
- Epoxy resin.
- Putty knife.
- Soil or small stones.
- Acrylic paints.
Polyurethane foam background
The work is carried out in several stages.
- Apply the first layer of foam onto a sheet of polyethylene using a spatula, distributing it evenly over the surface.
- To make the structure heavier, you can pour stones or sand onto the plate and leave it until completely dry.
- Apply a second thicker layer of foam, while forming an arbitrary relief. Large flat stones can be installed in the second layer to give the structure an aesthetic appearance.
- After drying, apply epoxy resin, previously mixed with acrylic paints, onto the sheet. This step is done in several stages because the resin thickens quickly.
- Next, the background is attached with glue to the wall of the aquarium.
Method 3
The most economical and fastest way to decorate is using cork bark.
To work you will need:
- Tree bark.
- Fishing line.
- Aquarium plants.
- Silicone glue.
During the work it is necessary:
- Peel the bark and rinse thoroughly with water.
- Secure aquarium plants with fishing line.
- Next, attach the bark to the wall of the aquarium using glue.
Glass painting with paints
The simplest decoration method is to paint the back wall in a single color. This is the easiest and cheapest way. It is better to take dark, monochromatic paint. Suitable colors are green, blue, brown. Uneven distribution of applied paint can lead to the appearance of gaps. Toxic substances used in dyeing become a threat to the life of aquarium plants and fish. It is not possible to change the background later.
Glass painting is more harmonious. To do this, you need to draw a drawing on a sheet of paper and transfer it to the wall of the aquarium using paints. You can simply print the design and install it on the surface to be decorated.
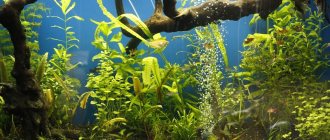
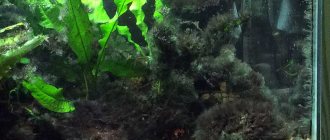
Decoration with living plants
One of the most complex and effective ways to decorate the back wall of an aquarium is to decorate it with live plants. This type of decoration helps to create a voluminous background for the aquarium without the use of toxic substances that harm its inhabitants.
Before starting work, you must prepare the following materials
- Metal network.
- Rubber suction cups.
- Synthetic thread or fishing line.
- Decorating material - moss, algae.
Plant background
Once the materials are prepared, you can begin the creation stage.
- First you need to cut the mesh into two pieces the same size as the back wall of the aquarium.
- Place moss or algae on the mesh, securing them with thin fishing line or thread. The moss must be installed tightly so that there are no free spaces.
- Next, you need to fold the mesh in half, securing the ends with fishing line. Place suction cups on the back surface of the glass and secure the mesh.
The decoration will not look very nice, but only until the moss grows. It is important not to leave a gap between the net and the glass when attaching it, as some fish may swim under the decoration and not find a way to get out.
DIY 3D background for an aquarium
If you have a large fish aquarium, you can make it original by creating a 3D background with underwater rocks. It will be necessary to comply with a number of conditions and recommendations for such a homemade product to be safe for aquarium inhabitants. The work itself takes a long time, but the result looks impressive.
Materials
To create a 3D background for an aquarium with your own hands, prepare:
- empty aquarium;
- foam insulation sheets;
- silicone without impurities;
- bamboo skewers and toothpicks;
- cement;
- coloring pigments for cement;
- brushes;
- wire cutters;
- ruler;
- pencil;
- acrylic paints.
Step 1
. The first thing you need to do is determine where your fish will be for the next few weeks. After making the background, it should stand in an aquarium with a filtering installation without fish for about two weeks.
Step 2
. Take a large sheet of whatman paper or cardboard that matches the size of the wall of the aquarium that you are going to decorate. Attach it to the glass and sketch out the general outlines of the layout of the underwater rocks.
Step 3
. Attach the outlines of the layout to a sheet of foam, outline them, and leave the sheets themselves rectangular at this stage.
Step 4
. Using a serrated knife, begin cutting out parts of the underwater rocks. Secure them together with toothpicks or bamboo skewers. When leaving passages in the rocks, be sure to keep in mind that the thickness of the walls will be slightly increased due to cement. They should be large enough so that the fish can swim freely without getting stuck.
Step 5
. As you fasten the pieces of rock together, gradually pin them to the background sheet of foam. To calcify all parts, use silicone without impurities. The latter can be disastrous for the fish. Bite off excess parts of sticks and toothpicks with wire cutters. Don't worry if the rock shapes are rough. This will still be adjusted as further work progresses.
Step 6
. Having completely formed the background in this way, cut off the straight lines of the plates using a serrated knife.
Step 7
. Dilute the cement with water according to the manufacturer's instructions and begin applying it to the surface of the artificial rocks. Cover the working surface of the table before work. Apply cement in several layers, allowing the previous one to dry.
Step 8
. Add a dark liquid pigment to the cement mortar and apply a thin layer of it to all the stones.
Step 9
. After the dark pigment layer has dried, add brown pigment to the cement composition and paint the protruding parts of the rocks with it to create texture.
Step 10
. Add a light pigment to the cement and once again pass it over the surface of the volumetric background, creating a play of light and shadow. Let the entire structure dry thoroughly.
Step 11
. Rinse the entire structure thoroughly under running water to remove fine dust and excess cement particles. Let the structure dry again.
Step 12
. Glue the created rocks to the dry wall of the aquarium. Use silicone for gluing. Make sure that the back wall is pressed against the glass as tightly as possible. Make supports and leave them until the silicone dries completely.
Step 13
. Once again, go over the edge of the background with silicone and remove any excess by moistening the cloth with alcohol.
Step 14
. You can paint the visible part of the glass on the back side with acrylic paint of the desired color. Fill the aquarium itself with water and check the PH level.
Let the aquarium stand like this for about two more weeks. Afterwards, if everything is in order with the water, you can decorate the aquarium with plants and add fish.
DIY 3D background for an aquarium
4.2/5 — Ratings: 48
Similar articles:
- DIY wallet for coins or stamps
- DIY water filter for the garden
- DIY tool shelf
- 2 in 1: stand for knives and gadgets with your own hands
How to attach a background
Making the background is not difficult, but the next step is installing it. Knowing how to correctly install the background on the back wall is necessary so that the structure holds securely and does not come off a few days after its installation.
The background for the aquarium can be attached in different ways, depending on what material is used for decoration. The choice of fastening material depends on the size and weight of the structure. The film can be fixed with a soap solution. This method is ineffective, since over time the sheet lags behind the wall. More reliable - securing with tape. The film is installed on the back wall and pasted over the entire surface. You should glue it carefully and smooth the tape so that no bubbles form.
To attach more voluminous decorations, you can use a special glue and sealant. PVC plate materials are attached using silicone rubber.
How to glue a background to an aquarium with glycerin
There are several ways to attach film to the back wall at home. Experience shows that ordinary medical glycerin copes best with the task. It is absolutely colorless and non-toxic. Unlike soap solution, it does not leave annoying streaks.
Required material and tools
To glue the film to the aquarium, you need to prepare the following material and tools:
- a bottle of glycerin;
- background film;
- 5-10 napkins;
- stationery knife;
- silicone spatula.
On a note! The spatula successfully replaces an out-of-use plastic card. If you have a hard piece of cardboard at home, you can use that.
Stages of work
Before gluing the background to the back wall of the aquarium, you need to free it from aquatic inhabitants, drain the water, wash, clean and dry. The size of the film must be adjusted to the dimensions of the rear window minus 3-5 mm. If the edges of the film protrude, this will affect not only the aesthetics, the film will quickly peel off. The excess must be cut off immediately, before the film is glued. It will not be possible to do this exactly on the spot.
Next we proceed as follows:
- Place the aquarium on a flat surface (table, floor) with the back wall facing up. You must make sure that the surface is clean, free of dust and lint. It's better to play it safe and clean it with glass cleaner.
- Apply glycerin drops evenly onto the surface of the glass. 50 ml of product is enough to glue the wall of a 50 liter aquarium. Brushes should not be used as they may leave lint.
- Carefully glue the film on top, gently pressing it to the surface.
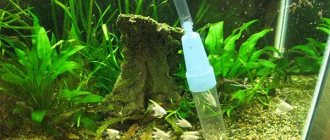
- Now you need to slowly scrape the glycerin to the center of the film using a silicone spatula.
- After the glycerin is collected in one place, we begin to distribute it evenly over the surface. It is necessary to move the spatula in all directions, from the center to the edges of the aquarium.
- Glycerin protruding from the edge should be immediately removed with a napkin. To prevent the spatula from getting dirty with glycerin, you can wrap it in a napkin.
- After the work is completed, you need to carefully inspect the surface again for the absence of folds and bubbles.
You can paste the film within 15-20 minutes. Unlike water or soap solution, glycerin hardly forms bubbles. Therefore, all that is required from the aquarist is to straighten all the folds and expel excess glycerin to the edges. The glycerin film holds very tightly. If necessary, it can be removed and replaced with another one.