A hamster house is a mandatory piece of interior design for a hamster. But how to make it yourself? Since in the wild these fluffy creatures dig holes in which they hide, then in captivity they they need places where no one will disturb them and they can rest peacefully
.
It is extremely simple to build a shelter for an animal yourself, and a variety of available materials are suitable for this role.
From coconut
Such a cozy hut will undoubtedly please the furry tenant, and it is also pleasant to chew on, since it is made from a natural substance. You will need: coconut, spoon, engraver, wood saw, marker. First of all, you need to choose a coconut that is suitable for the size of your hamster.
Cracked and damaged material must not be used.
. Using a hacksaw, carefully saw off the top of the nut. Empty the container of liquid and remove the white pulp with a spoon. We thoroughly rinse the future house and dry it dry. Using a marker, we outline a round entrance. Using an engraver, we cut out the opening and grind all the cut edges. It is not forbidden to make windows if desired.
Watch the video on how to do this.
From a plastic container
Now we’ll find out how to make one for your hamster from a plastic container with your own hands. This material is perfect for this purpose. You can buy a new one or use an old one, the main thing is without damage. We heat up the soldering iron and cut out the front door. It is advisable to use the same hot tool to make several holes around the circumference of the container, so that nothing will prevent air from penetrating into the fluffy’s shelter. We place the resulting blank with the open side on the bottom of the cage, and pour filler inside.
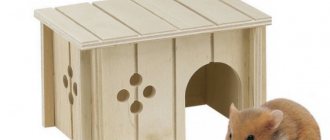
Made of wood
For a wooden house you will need a lot of ice cream sticks, rubber bands, and glue. Initially, you should prepare the blanks: 3 walls and a floor. We glue the sticks together so that we get flat rectangles or squares as desired. Using glue, we connect the floor with three walls. We fix the building with an elastic band until the adhesive hardens.
The fourth wall is not needed completely, but only half of it
. Let's make it in the same way as the previous ones. Glue it to the workpiece so that there is a hole at the bottom for entry. Now it's time for the roof. Using glue, we connect the sticks as supporting rafters. We glue the remaining parts crosswise. We assemble the structure together, fastening it with adhesive.
From plywood
If you have ever made a birdhouse, then you will not encounter any problems with the construction of such a shelter. We cut out 4 pieces from plywood: 2 are 13 cm long, the remaining ones are 15 cm long. The height of the parts is at least 7 cm. Carefully sand the plywood pieces. We cut a hole in one part, it will serve as an entrance for the fluffy.
We assemble the structure in the form of a parallelepiped and secure it with nails
. The connecting elements should not stick out from the plywood, otherwise the animal will not be protected from injury. All that remains is to cut out the roof in the form of a 13x15 cm rectangle. We also secure this part with nails.
From cardboard
It’s not difficult to make such a simple house, and you only need 2 cardboard paper rolls and scissors. We flatten one of the tubes as much as possible and cut out two semicircles in the middle from different sides opposite each other. We repeat similar manipulations with the other bushing.
We straighten the blanks and connect them, inserting each other into the resulting holes. You can assemble many such shelters in the form of cardboard labyrinths. The rodent will definitely like such toys, because he will sleep in them and play enough
.
From paper
This construction will not take much of your time, but, alas, it will not last long for your pet. We'll stock up on a balloon, white toilet paper and a container of water. Let's inflate the ball to the right size so that the baby can fit in there comfortably. We divide the paper products into pieces and moisten them in water. Place the soaked material evenly on top of the ball. 8 layers are enough. Move the workpiece to a warm place and let it dry. We pierce the base with a needle and remove it from the frame. Cutting out the front door.
From the box
Any food box will do for this purpose. Cut off the closing edge of the workpiece and cut a semicircular hole at the base. We place a cardboard roll left over from toilet paper into the hole. It is better to secure the structure with hot glue.
From plastic bottles
To build such a hut, you can use one or two bottles. Let's consider these options. It is worth finding a plastic container whose bottom width is suitable for the fluffy
. We cut off the lower part, as it will serve as a shelter for the rodent. Turn the cut side down and cut out the entrance. We heat up a thin metal tool and pierce the workpiece around the perimeter. This way the hamster will not suffer from lack of air. We cover the sharp cut edges with electrical insulating tape so that the baby does not get hurt.
For the next option you will need 2 bottles, preferably 5 liters in volume. We remove the containers from the necks using a knife. We cut a hole in the wall of the bottle equal to the diameter of the neck. Repeat the procedure with another container.
. We wrap the cut edges with electrical tape. We apply the blanks to each other so that the cut holes coincide and connect them with the neck.
It will be easier to equip a hamster cage due to space if your pet lives in an aquarium or a plexiglass dwelling.
How else can you equip a terrarium for a dwarf?
A homemade house for Djungarian hamsters may look something like the photo below. You can complement it with other accessories for a comfortable, fulfilling and energetic life for the animal. How to properly equip a cage for a dzhungarika so that it contains additional interior items that the rodent needs? You can equip your furry's apartment:
We attach the boxes so that the end result is a labyrinth. To get your baby interested in a new toy, we place treats in the “rooms”
.
- Toilet. It is worth finding a suitable container made of durable plastic, always with a lid. We make a hole in the side of the vessel, stepping back about 2 cm from the edge. Use sandpaper to smooth out all the irregularities. We install the toilet in the cage with the lid down and fill it with filler.
Don't forget to attach a hamster wheel to the cage. These rodents are very active!
How to set up a hamster cage?
Important criteria when choosing a building material for creating a cage in which a hamster will live are strength and safety. The size of housing is not so important for these cuties, however, large cages allow you to place all kinds of accessories for games and fun that will appeal to pets and their owners.
Cage made from plastic boxes or bottles
Capacious plastic containers, after minor modifications, become ideal for housing pets. A smaller box is suitable for a Djungarian hamster, a slightly larger one is suitable for a Syrian hamster.
The disadvantage of the design is the lack of ventilation, which can be corrected by making inserts of fine lattice in the sides and roof of the future house. The advantage of plastic: it can be freely cut with a knife or scissors, pierced with a heated awl to create holes for self-tapping screws.
Important! The sharp ends of self-tapping screws or screws should be directed outward to avoid injury to animals.
If two containers are placed one above the other, you can save on space for a second pet or equip a single animal with a second floor. In the latter case, the boxes are combined using a tunnel or ladder. Hamsters love transitions and loopholes.
The simplest tunnel can be easily made from a pair of ordinary plastic bottles, cutting them off on both sides and wrapping the sections with electrical tape. All that remains is to connect the containers together and secure them. Some owners prefer to make transitions from corrugated or sewer pipes.
For some time, a hamster can live in a house made of three six-liter plastic bottles. The upper part is cut off from them, which needs to be reduced so that a funnel with threads and a lid remains. The dishes are arranged in the form of a triangle or one on top of the other vertically. So that the animal can use all the rooms, holes are cut in the lower part of the bottles according to the size of the neck, into which blanks are inserted, playing the role of mini-tunnels.
Important! Cages made from plastic boxes or bottles can be supplemented with appropriate links and expand the living space of hamsters to reasonable limits.
Metal cage for hamster
Aquarium cage from the store
An aquarium or terrarium, as a home for a rodent, has certain advantages:
- excellent review;
- retention of odors inside the container.
- high humidity;
- fragile design;
- difficulty in attaching accessories;
- heavy weight.
In most cases, owners cover the finished glass box with mesh. In the case of a low aquarium, it is metal; for a high capacity, the mesh material is not important. The cold bottom is lined with a thick layer of sawdust. As an option, use a plexiglass box, which is much warmer and lighter. On the other hand, it is cloudy and prone to scratches.
Interior and exterior design
Arranging a cage for an animal involves equipping it with various accessories. This includes a hammock, a running wheel, tunnels, a house, a drinking bowl, and a feeding trough.
- Wheel. Running in circles will satisfy your hamster's need for movement. The diameter is determined by the size of the animal. A twenty-centimeter design is enough for Djungarians; wheels with a diameter of 30 cm are suitable for Syrians. As they grow older, the device is replaced with another one in accordance with the growth of the animal.
Wooden cage for a hamster
Important! Choose a solid treadmill; the grid can injure your paws.
- Tunnel. Helps maintain an active lifestyle. It is also selected according to the size of the pet. The main condition: so that the hamster does not get stuck.
- Hammock. Plastic or metal rocking chairs are responsible for the development of coordination of movements.
- Drinking bowl . The animal must be provided daily with clean drinking water poured into a nipple drinker or bowl.
- Feeder. It is not necessary to acquire a special container that is difficult to turn over; food can be scattered throughout the cage. It is useful for a hamster, especially the Djungarian breed, to hone its instinct to search for food.
- Litter. As a rule, dense, odorless wood pellets or large pressed sawdust, with the exception of cedar and pine, are poured onto the bottom of the cage. Such sawdust can cause allergic reactions or bronchospasm. An alternative option is finely chopped ears of corn, which the animals love to burrow into. Mineral litters are toxic to rodents, and cat litters should not contain clay. The minimum depth of litter is 6 centimeters.
- Nesting material. To set up a nest, hamsters are allowed to offer unscented toilet paper, paper napkins or towels torn into pieces.
Toys such as toilet paper rolls or cardboard boxes will occupy the hamster's attention for a long time until he chews them. Mineral stones are used to grind teeth.
Important! When the air temperature in the room is high, it is advisable to place a piece of ceramic tile or tile with ground edges in the cage. These objects remain cool even in the heat and the animals will be able to cool themselves by lying on them.
How to make a second floor in a cage?
The second floor in a hamster cage is additional territory, which means joy for the pet. You can also do it yourself.
To do this you will need roll sticks, a marker, wire, a ruler, wire cutters, and a heat gun.
- We measure the length and width of the planned site.
- We adjust the Chinese sticks to the size of the platform using wire cutters.
- We leave two sticks of standard length, they will be load-bearing.
- We place two cut sticks on one and the other edges transversely, and lay the rest horizontally on them.
- Using glue we connect the structure.
- When the platform is dry, we place it in a cage on supports and secure it with wire around the entire perimeter
.
How to build a warm home for a Syrian hamster?
To keep your Syrian hamster warm in your apartment, you don’t need to resort to any tricks.
The main thing is not to skimp on hay, sawdust or other fillers in order to insulate your home as much as possible. White paper will also help your baby cope with the cold.
.
Place a couple of leaves in the cage, and the pet will independently tear the “building material” into pieces and drag it into the house, forming a kind of “nest”.
By the way, in winter, you can decorate the rodent’s cage yourself for the New Year or Valentine’s Day. And read about that in this article.
Choosing a cage for a hamster
The health of the animal depends on the choice of housing. Take this seriously. There are many cell options in stores. These are cages with rods, containers, aquariums.
Consider all the pros and cons of each type and use these tips:
- Consider the size of the future nest. There should be enough space for the pet to live comfortably.
- Ventilation is required in the cage. If there is not enough of it, ammonia will accumulate and bacteria will multiply, which will negatively affect the life of the hamster.
- Choose from prefabricated housing and accessories. To make it convenient for you to disinfect every corner.
- Buy a second small cage or carrier . It will be needed to remove the animal while cleaning the main housing.
- Pay attention to the height of the pallet. It is important that it be at least 6 cm. At a lower height, debris and filler will fly outside the cage.
- Choose a cage with a strong mount. There are types of roof and door fastenings that can quickly break themselves or break the frame. Or they will weaken. Then a gap will appear and the hamster, trying to crawl through it, may die
Important! If you want to make a cage with your own hands, choose a container. Houses made of cardboard, plywood and wood are not durable.
Where to put the housing?
Since hamsters frolic in the dark and gain strength during the day, it is not difficult to guess where to place his apartment. Place an aquarium for a hamster in a quiet and cozy corner without direct sunlight.
. The hamster will get a chance to get a good night's sleep during the day, because he will not be disturbed by the sun or human fuss. Also, do not forget to avoid drafts so that the tiny creature does not catch a cold.
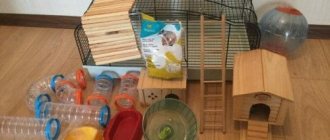
Have you decided to get a pet and have chosen a hamster? If you are interested in how to make a hamster cage with your own hands, then this review of methods will be very relevant for you! We will tell you how to make a house for a hamster with your own hands from available and inexpensive materials, and also provide you with a simple master class on video. Open it and read on, lovers of cute rodents!
What you will need
Hamsters are among the most commonly kept as pets. There are various options for cages for hamsters, photos of which can be seen on the Internet. The easiest way to make a hamster cage with your own hands is from a container - yes, the most ordinary container that can be found in every home. Of course, it is better to buy a brand new box for your pet. Prepare the following materials:
- a regular large plastic container;
- scissors;
- metal or plastic mesh;
- Super glue.
Step-by-step instruction
- Take a plastic container and remove the lid from it. On the back of the lid, draw a rectangle measuring approximately 45 cm by 15 cm. Drawings on plastic are best done with a felt-tip pen or marker. Cut out the drawn rectangle from the lid.
- Cut a fragment measuring 50 cm by 20 cm from a metal or plastic mesh.
- On the back of the lid, use superglue to glue a rectangle of mesh. Now the pet’s housing is ready.
Before introducing your hamster into a new home, add about 5 cm of wood shavings or special filler to the bottom of the container. You can buy it at a specialized pet supply store.
You can see how to make a temporary house for a hamster in the following video from YouTube:
Hamsters remain one of the traditionally favorite pets of children around the world. These fluffy, nimble animals tolerate human contact well. Observing his habits pleases not only children, but also adults. Modern industry produces a large number of different types of hamster cages for these small rodents. Some are made from plastics, others are made from artificial wood materials using glass and metal.
At the same time, many factory cages have some disadvantages that do not take into account the characteristics of the animal and the conditions for monitoring its vital activity. This article will focus on the process of making a hamster cage with your own hands.
Before you begin directly to work, you need to draw up a project for the future cell. For this work, you can involve children and use the help of some graphic editor. In parallel with designing the structure of the future craft, it is necessary to determine the linear dimensions of its individual elements of the hamster house. Having decided on the desired shape and size of the parts, you can proceed directly to making the house.
For construction it is necessary to prepare the following materials:
- sheet of lined chipboard;
- plexiglass or window glass;
- sandpaper;
- door handle;
- furniture legs.
The manufacturing process of the structure will require the following tools:
- electric jigsaw or circular saw;
- carpenter's square;
- ruler;
- pencil;
- screwdriver or screwdriver;
- drill.
Having prepared the entire list of materials and tools, you can begin making a home for your pet. The first stage of work is drawing lines that limit the contour of future parts - marking. Using a ruler. Using a square and a pencil, we draw the outlines of the parts on a sheet of chipboard and plexiglass.
We cut materials using electrified cutting tools - a jigsaw or a circular saw. The edges of the resulting structural elements must be thoroughly cleaned with sandpaper. To prevent the hamster from destroying the open surfaces of parts to which it will have free access, they must be covered with suitable metal corners. To attach the protective edging to the edges of the parts, drill small holes in them and screw them to the parts with self-tapping screws using a screwdriver or screwdriver. Having drilled holes in the place where the side walls, ceilings, and bottom are attached, we assemble the product using self-tapping screws of the required length.
To make the front wall of a hamster cage, we use parts made of plexiglass or regular window glass. We attach them using square blocks of wood or chipboard and previously used metal corners. We fasten the blocks with self-tapping screws to the side walls through pre-drilled holes.
To make the lid, we make a frame from the base material. To do this, we pre-drill a hole with a diameter of eight to ten millimeters, and cut it out with a jigsaw according to the pre-made markings. Using small self-tapping screws, we attach a fine-mesh steel mesh of the required size to the hole in the future lid. This will create the necessary microclimate in the hamster's house. We attach the lid to small furniture hangers. To prevent the lid from tipping over when opening, you can install simple stops made of two pieces of metal chain. The use of other materials may result in rapid wear due to constant contact with the rodent's teeth.
A separate design element is a drawer. It will store sawdust or other bedding for the animal. To make it, you need to connect the parts that have been sawn off in advance. There is no point in installing any mechanisms for it. At the same time, the size of the box should allow it to move freely inside the cage without distortion. This is necessary when performing periodic cleaning. To make it easier to pull out, you need to attach any type of furniture handle to the front wall of the drawer.
Don't forget to make a small ladder to move your pet from one floor to another and small hatches. The edges of hatches should also be trimmed with metal corners to prevent damage by rodents.
To complete the process of making the product yourself, you need to install four furniture legs on the bottom, providing a slight lift of the structure from the floor.
For the hamster to fully exist, it is necessary to install a drinking bowl, feeder and wheel in the cage for daily intense physical exercise, unfortunately, usually at night. Place the animal's home where there is sufficient light and no draft.
Dear readers, comment on the article, ask questions, subscribe to new publications - we are interested in your opinion :)
Hamsters are nimble animals that need a house that meets all their requirements. The necessary paraphernalia is quite expensive. Therefore, rodent owners often think about building their own housing for their pet. It is rarely possible to make a hamster cage with your own hands from available materials. But with some effort and purchasing the necessary materials, you can build a real palace. The cost of a homemade cage will be lower than a ready-made cage purchased in a store.
What can you make a cage out of?
From coconut
Such a cozy hut will undoubtedly please the furry tenant, and it is also pleasant to chew on, since it is made from a natural substance. You will need: coconut, spoon, engraver, wood saw, marker. First of all, you need to choose a coconut that is suitable for the size of your hamster.
Cracked and damaged material must not be used . Using a hacksaw, carefully saw off the top of the nut. Empty the container of liquid and remove the white pulp with a spoon. We thoroughly rinse the future house and dry it dry. Using a marker, we outline a round entrance. Using an engraver, we cut out the opening and grind all the cut edges. It is not forbidden to make windows if desired.
Watch the video on how to do this.
From a plastic container
Now we’ll learn how to make a hamster cage from a plastic container with your own hands. This material is perfect for this purpose. You can buy a new one or use an old one, the main thing is without damage. We heat up the soldering iron and cut out the front door. It is advisable to use the same hot tool to make several holes around the circumference of the container, so that nothing will prevent air from penetrating into the fluffy’s shelter. We place the resulting blank with the open side on the bottom of the cage, and pour filler inside.
Made of wood
For a wooden house you will need a lot of ice cream sticks, rubber bands, and glue. Initially, you should prepare the blanks: 3 walls and a floor. We glue the sticks together so that we get flat rectangles or squares as desired. Using glue, we connect the floor with three walls. We fix the building with an elastic band until the adhesive hardens.
The fourth wall is not needed completely, but only half of it . Let's make it in the same way as the previous ones. Glue it to the workpiece so that there is a hole at the bottom for entry. Now it's the turn of the roof. Using glue, we connect the sticks as supporting rafters. We glue the remaining parts crosswise. We assemble the structure together, fastening it with adhesive.
From plywood
If you have ever made a birdhouse, then you will not encounter any problems with the construction of such a shelter. We cut out 4 pieces from plywood: 2 are 13 cm long, the remaining ones are 15 cm long. The height of the parts is at least 7 cm. Carefully sand the plywood pieces. We cut a hole in one part, it will serve as an entrance for the fluffy.
We assemble the structure in the form of a parallelepiped and secure it with nails . The connecting elements should not stick out from the plywood, otherwise the animal will not be protected from injury. All that remains is to cut out the roof in the form of a 13x15 cm rectangle. We also secure this part with nails.
From cardboard
It’s not difficult to make such a simple house, and you only need 2 cardboard paper rolls and scissors. We flatten one of the tubes as much as possible and cut out two semicircles in the middle from different sides opposite each other. We repeat similar manipulations with the other bushing.
We straighten the blanks and connect them, inserting each other into the resulting holes. You can assemble many such shelters in the form of cardboard labyrinths. The rodent will definitely like such toys, because he will sleep in them and play enough .
From paper
This construction will not take much of your time, but, alas, it will not last long for your pet. We'll stock up on a balloon, white toilet paper and a container of water. Let's inflate the ball to the right size so that the baby can fit in there comfortably. We divide the paper products into pieces and moisten them in water. Place the soaked material evenly on top of the ball. 8 layers are enough. Move the workpiece to a warm place and let it dry. We pierce the base with a needle and remove it from the frame. Cutting out the front door.
From the box
Any food box will do for this purpose. Cut off the closing edge of the workpiece and cut a semicircular hole at the base. We place a cardboard roll left over from toilet paper into the hole. It is better to secure the structure with hot glue.
Should you feed hamsters bananas?
From plastic bottles
To build such a hut, you can use one or two bottles. Let's consider these options. It is worth finding a plastic container, the width of the bottom of which is suitable for the fluffy . We cut off the lower part, as it will serve as a shelter for the rodent. Turn the cut side down and cut out the entrance. We heat up a thin metal tool and pierce the workpiece around the perimeter. This way the hamster will not suffer from lack of air. We cover the sharp cut edges with electrical insulating tape so that the baby does not get hurt.
For the next option you will need 2 bottles, preferably 5 liters in volume. We remove the containers from the necks using a knife. We cut a hole in the wall of the bottle equal to the diameter of the neck. We repeat the procedure with another container . We wrap the cut edges with electrical tape. We apply the blanks to each other so that the cut holes coincide and connect them with the neck.
It will be easier to equip a hamster cage due to space if your pet lives in an aquarium or a plexiglass dwelling.
Homemade hamster cage
Building an “apartment” for a pet is a task that requires certain skills and abilities. Don't be afraid of failure, even if you haven't done similar things before. Sometimes, even if you act strictly according to plan, you have to make adjustments to the project, and the cell turns out to be a completely different look.
To make a pet cage at home you will need:
- Metal mesh with a small distance between the rods.
- Narrow-point pliers.
- Metal cutters.
- Aluminum wire.
- Paints for metal surfaces or enamel.
- Stiff wire for hooks.
- Solvent (for example, white spirit).
- Paint brushes.
- File.
- Plywood.
- Fasteners for plywood.
Instead of plywood, you can use PVC. Then you will need not fasteners, but glue. Both materials are intended for making a house pallet.
A house made of wood is more environmentally friendly and safer for a pet, but is difficult to assemble. When using PVC sheets for a pallet, you should remember that the glue will take at least a week to dry, since it is poisonous to rodents.
To cut plywood or PVC you will need a jigsaw.
Before you start building a cage, think over the layout of your home. Draw a drawing, think about the location of toys, feeders and drinking bowls.
The principle of assembling a homemade iron cage:
- Create a cage frame from mesh.
- Cut out all the necessary openings - windows and doors.
- Treat the edges of the grill to prevent your hamster from cutting himself. Bend them with pliers and file them.
- Treat the grille with solvent and paint. Use only rodent-safe paints.
- Connect all parts with aluminum wire.
- Make hooks for closing the door from stiff wire.
When the frame is ready, start making the pallet:
- Calculate the required parameters of the pallet. Cut out the necessary blanks.
- Fasten the sides and bottom together.
- Inside the pallet, attach plastic beams that will cover the joints between parts of the product.
- If the cage is very heavy, make stiffening ribs at the bottom so that the pallet does not sag.
- To ensure reliability of the structure, stick plates on the corners that additionally support the pallet.
- Make the legs for the cage from the same material as the tray. Place them on the bottom of the tray in the corners.
Don’t forget, it is necessary to dry the pallet for at least a week after assembly so that the toxic substances evaporate.
Showcase for a hamster - video
Making a display case for a hamster with your own hands will be an excellent solution for those who like exclusive and functional things. The ability to make a house for a hamster of any size will be a plus for owners of small apartments, and an individual design will be a pleasant addition to any interior.
Hamsters are nimble animals that need a house that meets all their requirements. The necessary paraphernalia is quite expensive. Therefore, rodent owners often think about building their own housing for their pet. It is rarely possible to make a hamster cage with your own hands from available materials. But with some effort and purchasing the necessary materials, you can build a real palace. The cost of a homemade cage will be lower than a ready-made cage purchased in a store.
How to make a hamster cage with your own hands from a box
The rodent house is not made from an ordinary cardboard box. Cardboard is a fragile material. Such a cage will not be able to hold the animal. The hamster will quickly gnaw through the walls and run away. A do-it-yourself hamster cage can be made from household plastic containers. These items are perfect for both Dzungarians and Syrians. You can easily find a container of the required size at a regular hardware store.
The animal's cage must be well ventilated; for this, part of the wall and lid is cut out. A fine grille is installed in this place. It should be carefully processed so that the rodent does not get injured.
The plastic is easily cut with scissors or a knife. The mesh is attached with self-tapping screws or screws with nuts. It is better to prepare holes for fastenings in advance. Make holes with a hot awl or use a drill. The sharp ends of the fasteners should not point into the cage, otherwise the animal may be injured. Insert the fasteners with the cap facing inward.
A container house can be made two-story. This design looks like a rack. The second floor can be used as a house for another pet. When installing one container on another, it is necessary to additionally install a wall with grilles for ventilation.
To arrange a two-story home for one pet, the “elevator” problem is solved by installing a tunnel from the first floor to the second. This method of movement will please the animal and is safe for health. Hamsters are active pets who love to run in tunnels, wheels and just around the house. The construction of a second floor will allow you to expand the rodent’s habitat, accommodate additional entertainment and make your pet’s life richer and more interesting. Tunnels are sold in various stores. Sometimes they are made from scrap materials at home. Usually tunnels are made from plastic bottles.
To create the tunnel, cut off the bottom and neck of the bottle so that the diameter of the remaining part is the same at all ends. Wrap the edges of the bottle with electrical tape. Connect the bottles together with electrical tape and check the strength of the connection. Choose the width of the container according to the size of the hamster. For Djungarian hamsters, a 1.5 liter container is sufficient.
Additionally, plastic and corrugated pipes are used for the “lift” for installing washbasins. Their disadvantage is the opacity of the product.
How to choose a cage for a hamster?
First of all, when purchasing a cage, you should pay attention to its size. Regardless of how many floors there are in the building and what breed the animal is, the area of the hamster tray should be at least 1500 cm (30x50), the required height is from 30 cm.
Why does a small hamster need such a large cage? Everything is explained simply. Under natural conditions, these animals live in deserts and other open spaces, where they have to travel considerable distances in search of food and materials for making a burrow. A hamster either sleeps or moves all its life, but in a small cage it is limited. The animal's health deteriorates in such conditions and it rarely survives for more than a year. Therefore, in order for a pet to be active and healthy, its freedom cannot be limited in a cramped cage.
A hamster's cage must be well ventilated. Otherwise, ammonia can accumulate in the animal’s home, and it is very toxic. In addition, in a cage where air circulation is poor, bacteria can accumulate, which can become a source of dangerous diseases for the hamster. Therefore, instead of aquariums and other closed structures, it is better to opt for the option with metal rods.
Due to the fact that the cage needs to be cleaned at least 2 times a week, sometimes more often, it is worth purchasing a model that is easy to clean. It is also advisable to have a smaller spare cage to place the animal there while the main housing is being cleaned.
If you are wondering which cages are best for hamsters, it is advisable to choose monolithic models that have a plastic bottom. If the tray has a metal grid, the animal may cling to it with its paws and get injured.
Different types of cages will suit different breeds of hamsters. If you can buy almost anything for Syrians, the main condition for them is the large size of the home. For smaller species of hamsters, you need a cage with a small gap between the bars so that rodents do not slip through them. Djungarian and Chinese hamsters can live in aquariums and plastic cages - it will not be easy for them to escape from them.
Hamster cage made from plastic bottles
A homemade cage made from plastic bottles is suitable for temporarily keeping an animal. Use three 6 liter bottles. Cut off the top of the container so that a container of the same diameter remains. Separate the threaded neck from the cut part. Cover the edges of all parts with electrical tape. Make a hole in the lid so that one threaded “washer” remains.
Start assembling your three-room home. Place the containers in one row, bottom down. Cut holes not high from the bottom with a diameter that matches the size of the neck. These are future tunnels between rooms. Make holes in the remaining rooms at the same level.
Place the bottles next to each other. Insert the neck into a specially made hole on one side, and secure with a “washer” on the other side. Proceeding similarly, connect all the rooms with improvised tunnels.
Fill the bottles with hay or sawdust, install the necessary equipment for feeding and entertaining the animal. The “apartment” can be expanded by adding additional bottles. Broken parts can be easily repaired by simply replacing them with new ones.
How to do it?
Making a homemade hamster cage at home is not difficult. You can even make a home from scrap materials that are likely to be found in every home. Here you can learn about several optimal options that are standards for building a hamster cage.
Plastic bottle cage
To make a home for a hamster from plastic bottles, you will need 3 bottles with a capacity of 6 liters.
- First you need to cut off the neck, leaving about 8–10 cm from the lid.
- Cut out the middle of the lid (threaded washer).
- Make holes in the side of the bottle equal to the diameter of the neck cap. Similar holes need to be made in only two bottles, and in the last one, holes must be made on both sides. In order to connect the bottles, you will have to insert the cut neck through the hole on one of them, but so that it also passes through the hole of the second bottle.
- To secure the bottle from the inside, secure the neck with a threaded washer.
- Similarly, attach the third bottle to those two.
- At the bottom of the bottles, make small holes for the rope so that the house can be moved or hung somewhere if necessary. Pass a strong rope through the hole you made.
Thus, you can make a three-room “apartment” for your pet.
If you need to clean and clean one of the “rooms”, then you can easily disconnect the bottle from the other by unscrewing the washer.
From the box
The second simple way to make a cage is to create it from an ordinary cardboard box, for example, a shoe box. However, the bottom of the box will have to be filled with sawdust or special filler. Also, you should not make a cage out of a small, low box, otherwise the animal can easily leave the territory of its “apartment”. Prefer large, spacious boxes with taller sides.
Made of wood
You can also build a cage from ordinary wood. This method is more complicated than the previous two, however, a house made of wood will be much stronger and more attractive in appearance.
In order to build it, you will need pliers, a double-sided file, aluminum wire, a paint brush, an electric jigsaw (if not, you can replace it with a circular saw), fine mesh, side cutters, metal paints, plywood.
DIY hamster terrarium
The glass terrarium provides odor insulation and reduces noise penetration. It is more interesting to observe a rodent through glass. Disadvantages of this housing:
- The heaviness and fragility of the house.
- Difficulties in attaching a special drinker and wheel.
- High humidity inside the pet's home.
For terrariums, glass containers are usually used, covered with mesh for ventilation. If the aquarium is quite high, the material of the grate is not important, since the pet will not reach it with his teeth.
Glass houses can be cold for your pet. It is recommended to line the bottom with plenty of hay or sawdust. Plexiglas cages are warmer and lighter, but visibility is impaired due to the quality of the material. Scratches quickly appear on plexiglass.
How to make a rack/display for a hamster with your own hands - step-by-step instructions
To make a rack you will need the following materials and tools:
- Wooden boards/chipboard sheets/plastic sheets/plexiglass for making walls and pallets. If you plan to make the rack long, then the source material should have a thickness of 2-2.5 cm to avoid sagging.
Important! Wood tends to absorb moisture and odors, so it is necessary to purchase special impregnation-sealants for wooden boards.
Manufacturing process:
Before starting construction, you need to find a drawing of the rack of the desired size. A drawing of an ordinary two-story shelving or bookcase is suitable as a sample.
Important! Before you start marking, make sure that the display case will fit in the space allocated for it. Remember that the hamster's house should not be placed near various heaters, radiators and other heating devices.
When making a two-story rack, you need to think in advance about the location of the shelves and stairs between them so that the hamsters can move around without difficulty.
After transferring the drawing to the material, you can start working:
- Cut out the pieces using a hacksaw or electric jigsaw.
- If desired, cut holes for windows in the side walls of the rack; they will promote good ventilation.
- Attach pieces of metal mesh or iron rods to the openings for the windows with self-tapping screws, and cover the screw caps with aluminum thresholds.
- Attach the side walls to the base with tie screws or self-tapping screws.
Important! The base material should be thicker than the material used for the walls.
Reference! When making a large rack on several floors, you can leave the last floor open, this will make cleaning easier. For safety, it is worth making the last floor high enough so that the animal cannot injure itself by jumping out.
It is important to remember that the rack cannot be installed on the floor, as this will create a draft. A good solution would be to install it on a small cabinet in which you can store care supplies. If there is a lack of light, it is possible to equip the showcase with additional internal lighting.
What else can you make a home for a hamster from?
You can use cabinets and bookshelves as a house for your hamster. To do this, replace the top of the furniture with a ventilation grille, make several holes for air, and attach the wheel and drinking bowl. This home looks quite unusual. Equipping a cage for a comfortable stay for an animal is quite simple.
It is impossible to make high-quality and reliable housing for a hamster using paper or cardboard. The animal will chew through the material and run away.
You can use coconut as additional “houses”. Such accessories look unusual and cute. Fluffy pets will grind their teeth and receive useful substances. Making such a house is quite simple: remove the milk and... Cut off the “lid”. Drill some holes for ventilation.
There are many ways to make hamster cages at home. The most interesting and safest are wooden houses and structures. But making them yourself is quite difficult. The most economical, lightweight and interesting house will be made from plastic containers. Show your imagination when building a pet house. It will be much more interesting for a hamster to live in a high-quality, spacious home, and for the owner to watch the nimble animal.
Hamsters are very cheap, but the prices for cages, attractions, and houses are sometimes unimaginable. If you don’t currently have the opportunity to buy hamster paraphernalia, you can make a house for your furry pet yourself. We have collected useful tips for you that will help you build a magnificent house for your hamster with your own hands. The main thing is to do it with love!
In general, you can build a home for your furry friend from anything. The main thing is that the materials used are safe. The following materials are used to create a cottage and furniture:
- wood or plywood;
- cardboard, durable paper;
- plastic;
- natural materials.
To fasten the parts together, you will need a stapler, PVA, wood glue, and thick wire.
Advice. Use glue as a last resort, after first making sure that it is non-toxic!
If your project is to build a homemade cage for a hamster, then you won’t be able to get away with just wire. Here you will already need nails, screws, a hammer, a screwdriver or a screwdriver.
What can you use to make a home for a Syrian hamster?
If it is not possible to purchase a cage, you can make it yourself. The following designs are possible:
- A good solution would be a food container. Using it, you don’t have to worry about your pet chewing through the walls. There will also be no problems with ventilation.
- The mink is made by analogy with the animal’s natural home. The disadvantage of such a home is that it is poorly ventilated.
- You can use an aquarium. Its advantage is that the sawdust will not fly in different directions and the animal will not be able to easily get out, but the aquarium is not ventilated enough, which is a disadvantage.
- From a ventilation point of view, the most optimal solution is lattice cages.
Homemade hamster cage
Making a cage
To build a strong hamster cage with your own hands, you need to have basic carpentry skills. You can involve children in the process; they will be happy to help you draw up a project for your future cottage. Together you will build a unique cage for the dwarf, in which the animal will be comfortable!
Listed below are theses from which you will learn how to make a reliable and comfortable cage for a hamster with your own hands.
Make a project
When designing a homemade house for a hamster, you should approach it responsibly and think in advance about the area and height, the number of tiers and their location. You should make a detailed drawing in three-dimensional orientation, first put on it the supporting structures, then the levels and rooms, and then mark the places for furniture and attractions.
Important! Don't forget to sign the dimensions of future parts. If you don’t sign it and do everything “by eye”, the cottage for the fluffy will turn out lopsided.
Select material
The drawing is ready, now we should discuss the materials. Typically, a do-it-yourself hamster house is made from wood or plywood (frame and floor) and metal mesh (walls and ceiling). But a wooden surface retains unpleasant odors for a long time, so it is better to cover it with a piece of linoleum. All that remains is to prepare nails, screws and tools.
Make blanks
The most crucial moment. Guided by the project, you need to cut out the details of the future cage for the dwarf. Take the dimensions from your drawing. First of all, we make the floor, then the frame beams, and lastly the walls and partitions. Cut the metal mesh with a margin of 3-5 cm.
Build a cottage
To assemble the structure, you should adhere to the following plan:
- Lay linoleum on the base of the cage. Screw the supporting beams to the floor with screws.
- Place horizontal beams (roof base) on the supporting structures and nail them.
- Make tiers out of plywood.
- Stretch the mesh along the outer perimeter and attach it to the wooden parts with a construction stapler.
- The ceiling can be made from a sheet of plywood or mesh.
Attention! Make sure that the ends of the nails do not protrude into the cage. The sharp edges of the metal mesh should be on the outside.
A strong cage for the dwarf is ready. All that remains is to lay the filler and add the necessary furniture and attractions. Your furbaby can move in!
Arrangement of the cage
You need to think about what products for hamsters you should purchase first. If you think about it, there aren't that many of them.
In order to provide your pet with a comfortable stay, it is enough to purchase a couple of basic gizmos:
- Running wheel. Hamsters love to be active. Therefore, they may need a variety of things that can be bought or made independently. Among the most popular accessories is a running wheel. When purchasing it, you should be guided by the size of your animal. There is no need to buy an item that has crossbars or is made of mesh. The hamster will just break his legs.
- A drinking bowl is a must. It is important to choose an accessory that will not leak. You need to attach the water bowl to the outer wall, with only the spout inside. You can buy a special wooden bridge along with the drinking bowl. Accessories of this nature should be placed on top of the bowl so that, for example, hay from the bedding, sawdust or sand does not get into the water.
- You need to purchase a food bowl. However, it should be understood that food should be scattered around the cage periodically to satisfy the hamster's need to find food. He will dig sand, delve into sawdust, look for treasured food. When buying a bowl, keep in mind that it should not be too large.
- You need to make a choice in favor of a specific house for your hamster. In this matter, you need to be guided by the size of your pet. You can make the design yourself.
- Need to buy toys. They may be needed for grinding teeth and for climbing. You need to buy tunnels, labyrinths, etc. You can make these items for your hamster with your own hands. They are necessary due to the fact that the animal is constantly active and shows its energy.
- You need a harness or a special ball. What these accessories are will be discussed below.
Making a house for a dzhungarik with your own hands
A hamster's house is his fortress, a refuge where he can sleep or hide. Animals sometimes need privacy too. If your financial situation is difficult, but you like to make things with your own hands, figure out how to make a house for a hamster from scrap materials.
The shelter can be made temporary (for 1-2 weeks) or permanent. But you need to know what you can use to make a safe and comfortable house for a hamster.
Paper and cardboard houses
The most budget option is to make a small booth out of cardboard. But how to make a cardboard house for a hamster with your own hands? There are several unusual options. Here are some of them:
- Cardboard box house. Very often, inventive owners make temporary furniture for pets from cardboard. The advantages of this method are simplicity and low cost. Disadvantage: fragility. Take an empty tissue box and carefully cut it across the oval hole. You will get 2 finished houses. Some owners make a round entrance for their furbabies by gluing a toilet paper roll to the recess on the box.
- Spacious house made from a tea bag. Nothing could be simpler: take an empty tea box and cut a round or rectangular hole in it. In such a shelter the animal will be pleased to sleep or store its treasures.
- Purchased cardboard house. Sold in stores. The cardboard is folded along the dotted lines and glued together using PVA.
If you have imagination and free time, you can design and make a paper house yourself. Entrust this activity to the children - they will definitely cope!
Plastic houses
Plastic is not the best option for building a hamster shelter. The hamster is a rodent, and plastic often contains toxins. But a plastic house is also suitable as a temporary room for a couple of days.
Here are some ideas:
- House made from a food container. Manufacturers make food storage containers from non-toxic materials, so they are suitable to become a hamster’s shelter for several days. It is enough to make an inlet hole and pierce the lid for better air circulation.
- Palace from a construction set. Kids willingly take part in arranging a hamster's life. A hamster will look very cool in a designer house. It can be made to any size and installed inside the climbing frame.
Wooden huts
The most beautiful houses for hamsters are made from wood. Here you can give free rein to your creative imagination, and involve the whole family in the process of creating a home. A small house is enough for one hamster, but if you have a family of small rodents, it is better to build them a wooden palace.
First of all, we make a drawing and apply dimensions. Then we cut out parts of the required size and shape from wood or plywood. Before assembly, you should drill holes for entry in the front wall of the house and sand it thoroughly with sandpaper. To prevent the air in your home from stagnating, do not forget about the windows (we also polish them). Assemble the house using small nails or special wood glue.
If the house is on the first floor of a cage, then you can make it with a staircase and a balcony. Your hamster will definitely love this apartment! And photos of pets in such a home are good enough for an exhibition!
The hut made from ice cream sticks looks very interesting. Even preschoolers can take part in the creation process! The main thing is to explain to them what needs to be done. Here are simple instructions:
- draw a plan for the future home;
- separately assemble 4 walls and a roof (from one or two parts);
- glue all parts together with wood glue.
And for teenagers who are interested in needlework, a more complex option is suitable. They can make a two-story hut with a ladder, an opening door and a window. This is very painstaking work, it develops perseverance and the desire to finish what you start. And a hamster in such a house will be able not only to sleep and hide, but also to do gymnastics.
Cage requirements for Syrian hamsters
Cell dimensions
Although the hamster is a small animal, space is also important for him. The dimensions of the bottom of the cage should be from 30x50 cm, even if the cage has 2 or more floors. Minimum height - from 25 centimeters and above ; if this is a cage with floors, then the height between them should be approximately 0.3 m.
The dimensions of the door should allow the owner to easily reach the pet, and the gaps between the door and the cage should not allow the hamster to get out.
The distance between the rods should be within 0.5–1 cm.
Entertainment
It is recommended to put toys in the cage so that the animal can keep itself busy playing and not get bored. Hamsters need toys not only for entertainment, but also for grinding their teeth. You can buy them at a pet store, or you can use improvised materials. Hamsters love to play with toilet paper rolls and cardboard. It is necessary to ensure that there are no images on them, since paint is harmful to the digestion of rodents.
You can make a ladder from popsicle sticks; you only need to use non-toxic glue for gluing.
Litter
The most common filler for bedding is wood sawdust. They should not be very small, otherwise they will get into the animal’s nose or get tangled in its fur. Wood pellets should have no odor and be fairly dense.
Another great option is corn litter, which is shredded corn cobs with leftover kernels. This bedding is completely safe for small rodents.
Cellulose litter is suitable for hamsters who are allergic to wood dust. It is smaller and lighter than wood.
Important ! You should not use pine or cedar sawdust; your hamster may be allergic to them and there is a risk of breathing problems. You should also not use cotton wool, bandages and similar materials, as the hamster can get entangled in them and injure its paws.
In addition, it is recommended not to use cat litter containing clay, as it will stick to your pet's paws when wet. Some mineral litters are toxic to hamsters.
Drinkers and feeders for the Syrian hamster
Drinkers and feeders
It is better to choose feeders and drinkers that are attached to the bars of the cage, because Syrian hamsters often turn over everything in the cage.
You can also purchase heavier bowls made of ceramic, metal or plastic. You should not buy glass feeders, as your pet may break them and get hurt.
The best drinker option is a nipple drinker. A hamster can easily turn over a simple bowl, and he can throw filler into the inside of a bird drink like a bird's bowl. With a nipple drinker such problems will definitely not arise.
Houses
The cage must have a place for the small animal to sleep and have privacy. They use such a house to hide from prying eyes, sleep, and here they can hide their supplies.
A house for a Syrian hamster can be made of different materials. Rodents like wooden houses, but wood absorbs odors very well, which is its disadvantage.
A dwelling made of cardboard or wicker will be quickly chewed by a pet. A good choice is an economical and practical plastic option. It is also worth considering that the size of the house should allow not only to accommodate the pet itself, but also to set up a nest there and store its supplies. An option with a removable roof is convenient for cleaning.
Where should the cage be?
First of all, the cage should be located where the animal feels comfortable. If there are other pets in the house, then the furry baby’s home should be located so that other animals cannot harm him. In addition, the cage should be placed where the hamster will not be disturbed by sounds or lights, especially during daytime naps.
Important ! The hamster's house should be away from heating and electrical appliances, drafts, and direct sunlight. Otherwise, the health of the animal is jeopardized.
Is a running wheel a must-have?
Running wheel
Since Syrian hamsters are hyperactive creatures, they simply need a running wheel. The diameter of this wheel should be at least 18 cm, and optimally 23 centimeters. It is best to choose a wheel with a mesh surface, since a mesh surface can damage the foot . The mesh should be fine enough not to cause injury.
Mineral stone
Mineral stone is necessary for grinding teeth. In addition, it is a source of elements useful for a small pet.
Help : Rodents' teeth grow throughout their lives. Therefore, regular teeth grinding is mandatory.
There are mineral stones that can be attached directly to the rods, which is very convenient. Instead of mineral stone, you can give your furry friend small branches of fruit trees.
Do you prefer stone or branches?
Toilet
Usually the toilet is placed in the corner of the cage, as far as possible from the food bowl. The toilet is a tray with filler.
The tray should be spacious. As a rule, they take a rectangular or triangular toilet 15 - 18 cm long.
DIY housing for a hamster