What should an Elizabethan collar look like?
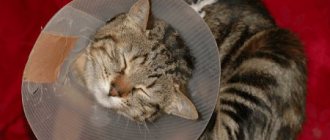
The Elizabethan collar is a cone-shaped design whose brim forms a barrier around the head.
It is very helpful in the postoperative period, when it is necessary to protect the animal’s wounds from scratching, gnawing and licking. Some owners also use it if it is necessary to treat their pet’s fur with parasite preparations that contain toxic components, and with hormonal agents.
A protective collar for cats can be purchased at a veterinary clinic or made by yourself. Regardless of the design option, the main requirement for the product is that it should be as comfortable as possible for the animal. The headband wrapped around the head should not rub the neck or make breathing difficult.
Self-production
You can not only buy a veterinary cap in a store, but also make it yourself. It is not necessary to use expensive materials; the collar can be made from improvised materials. The most commonly used is thick fabric, cardboard or plastic.
Made of plastic
You can make a cat collar with your own hands from a plastic bottle. This is a budget and at the same time convenient option.
To make a device from plastic, you need to cut a cone from a bottle. To do this, use two measurements:
- the circumference of the animal's neck;
- distance from the neck to the tip of the nose (add 5 cm to this).
These are the basic dimensions for the pattern.
After cutting out the half ring, you need to connect the edges using ribbons or Velcro. The edge that is adjacent to the neck should be covered with soft fabric to make it more comfortable to put on and the plastic does not rub the skin. If desired, you can sheathe the second edge, but this is not necessary.
Make sure that the top of the cap does not block the animal’s view (in this case it needs to be trimmed a little); the head should peek out slightly from under the top edge.
From fabric
Another material that can be used to make a veterinary cap is fabric. To do this, you need to choose a dense fabric so that the collar can stand up and perform its protective function:
- First prepare a paper model, for which use the same two measurements as for the plastic pattern (neck circumference, distance from neck to tip of nose, adding 5 cm).
- Then, using a paper template, cut out two matching patterns.
- They need to be sewn together to increase the density of the fabric. If it is still too soft, insert a suitable size piece of cardboard between the pieces of fabric.
- Make holes in the side edges and use tape or Velcro to connect them.
Made from thick fabric
A soft protective collar for cats after surgery is a product of increased comfort. It is ideal for gentle cats who are not ready to tolerate any restrictions. The collar is light and cozy. It's comfortable to sleep in.
To sew such a collar for a cat after sterilization, it is not at all necessary to have mastery skills. The product consists of only 2 identical parts made of natural fabrics. The layer between which is a denser fabric or a multi-layer lining, reinforced with diamond-shaped stitching. To give the collar the desired shape, the opposite edges of the product are supplemented with strips of adhesive tape.
The pattern of the product is shaped like the letter “C”. The length and width are selected depending on the size of the cat.
To correctly create a pattern, take 2 measurements:
- neck girth - it will correspond to the length of the inner semicircle;
- the length of the neck from the landing point of the product to the tip of the nose is the width of the future collar
Apply a semicircle that corresponds to the inside of the product on paper or directly on the canvas. Then retreat the specified width and duplicate the line, making an outer semicircle. Cut out the workpieces, not forgetting to provide indentations for the seams. Place the pieces right side out, placing a thick layer between them. Sew up the details. To increase the rigidity of the product, stitch a edging made of dense material along the outer edge.
Despite the simplicity of execution, this option is convenient in the sense that it has an aesthetic appearance and at the same time copes well with the task assigned to it.
But it is not suitable for active pets, since with regular protests and attempts to tear it off the body, the collar will become deformed and will not provide full protection. There is only one way out - to observe the behavior of the pet and, if necessary, replace the soft product with a more rigid structure.
Made of plastic
If your cat is restless and persistent, then in the postoperative period it is better to use a more rigid structure. To make a hard cat collar with your own hands, it is advisable to use flexible plastic.
To simplify the task, use this pattern as a basis. It is better to first print it on a printer and then transfer it to plastic.
If you have a large bottle with smooth walls at your disposal, then it is quite possible that you can get the required piece from it. You just need to attach the printed pattern to the surface and trace along the contour.
The numbers in the photo indicate: 1 – straps for covering the collar, 2 and 4 – places of sharp edges of the product, 3 – clasp.
To assemble the structure, all that remains is to bend three radial strips in half. Then you need to pass a collar or harness through them. The longest strip is used to join the edges. It just needs to be launched through the slots.
Important point! The main condition when creating such a collar is to reduce the risk of injury. The edges should not be sharp, otherwise they will hurt or cause chafing on the cat's delicate skin. It is better to frame them with tape or a fabric strip.
Another interesting, but at the same time quite simple to implement, manufacturing option based on a stationery folder is described in detail in the video clip:
If you wish, you can limit yourself to the very option of making a collar for cats, which is not difficult to make with your own hands from a bottle.
The basis for production was a plastic bottle. The neck was cut off and the sharp edges were sealed with tape. Holes were made in four places at equidistant distances, into which ropes were inserted to secure them to the collar.
Note! To prevent chafing, there should be a finger-thick gap between the collar and your pet's neck. Too large a gap is also bad, because with its help the cat can easily remove the collar with its hind paws.
Even if your pet has a calm disposition, fixing the collar is mandatory. As an alternative to taping, the sharp edges can simply be melted off. A visual inspection will help determine the need for additional insulation of areas adjacent to the wool. Redness may begin to appear within 20-40 minutes from the moment of putting it on.
From cardboard
As a temporary option, you can use a cardboard cat collar, which is easy to make with your own hands.
For manufacturing, it is best to choose thick packaging cardboard. These could be old boxes and crates. Some people opt for corrugated cardboard, but it is not so convenient to work with or carry.
To create a pattern, draw a semicircle on cardboard. The main thing is to make all calculations based on previously taken measurements.
Roll the blank into the desired shape and try it on the cat. Frame all cut lines with edging. The fastening option can be any: a strap system or fixation with lacing.
Be prepared for the fact that, regardless of the design, the collar will not cause much delight in the animal. Therefore, be patient and try to make life as easy as possible for your pet while wearing a restrictive structure.
The second quick option is a cardboard collar
A very simple version of making a cardboard collar is shown in the video below. The main character of the video is a bracket, but that’s not the point. As you can see, the owner got out of the situation very simply. I cut out a semicircle from cardboard along the length of the collar and attached it with adhesive tape. Due to the increased length, the edges of the collar overlap each other.
To make a more reliable Elizabethan collar from cardboard, you will need a set of tools, which were given in the instructions above: scissors, tape and a stapler. Note that using this pattern you can make a collar not only from cardboard. You can see the pattern diagram in the figure. The measurements taken are the same as in the previous version: neck girth and head length.
We draw up a similar diagram based on the measurements taken on thin paper and cut it out. We try on the pattern and adjust if necessary. To make a collar, you need to use thin and flexible cardboard (plastic is possible). We transfer the pattern to the selected material, cut it out, and fix the loops.
Next, you need to put the collar into the loops and do another fitting. As you can see, this model has an additional tail, which allows you to wear the collar open and neatly fix it. This option is very convenient if the cat has damage to its head, eyes, nose, ears, etc.
DIY Elizabethan cat collar made from a plastic bottle
Factory-made protective collars for animals are quite complex structures, attached to the collar with special straps, with a large number of latches and Velcro fasteners. Or you can do this simple option:
It seems that in order to prevent the ointment from being licked off for half an hour, while the medicine is absorbed into the skin, all these sophisticated devices are not needed.
Note. Why do cats aggressively resist the application of ointments and lick the medicine from the affected areas?
In fact, the problem is not in the spreading process itself, but in the strong unpleasant odors caused by the ingredients of the ointments. Tar, sulfur and other strong-smelling medications lead animals into an excited, even aggressive state, and not at all the process of gentle stroking.
To calm your pet, before the procedure you can give the cat a few drops of valerian, which, by the way, will somewhat eliminate the untidy smell of tar.
The Elizabethan collar sold in stores is equipped with many latches and fasteners, much like various types of carbines and swivels in military ammunition.
To cope with all these complex devices requires a fair amount of skill and practice.
We offer a simple option on how to make a collar from a plastic bottle, made in a few minutes, which is put on and fixed with one hand (while with the other three you hold the desperately tearing, scratching and biting animal, which suddenly turns out to be surprisingly strong and nimble).
- Cut a thick plastic bottle (sheet plastic, about a millimeter or two thick, is even better). Ideally, from a piece of soft fluoroplastic that does not form sharp edges and cannot damage the pet’s skin.
- Put together a pattern that will roll into a cone-shaped shape with a slight overlap.
- Pieces of Velcro are glued to the edges of the funnel with super glue, which will act as an instant fastener.
- The edges of the plastic may be sharp. To avoid damaging your pet's neck, cover the sharp cut edge of the collar with electrical tape.
- first option ;
- second option;
- third option;
- all options .
That's all. Such a homemade protective collar is quite enough to prevent the cat from trying to get to the smeared area within half an hour. During this time, the ointment should be absorbed.
If for some reason you don’t want to make this useful device for cats yourself, then you can purchase it very inexpensively in the Aliexpress online store:
DIY Elizabethan cat collar made from cardboard
A homemade protective collar made of cardboard is made similarly to the method described above.
The only difference is in the method of attaching the Velcro fastener - an adhesive connection here will not provide sufficient strength. It is better to sew Velcro to the edges of the cardboard collar using harsh threads.
- Opinion. The option of securing an Elizabethan collar made of cardboard with tape sounds rather dubious from the point of view of manufacturability. Where can I get at least one more hand to operate with a roll of tape? And tape, according to Murphy's Law, in such situations always ends up with a lost end.
The cardboard protective collar is disposable, as it is severely damaged and dirty when used, and cannot be washed or cleaned. But the task of tearing the hated box collar to shreds will help distract the cat for the minutes necessary to absorb the ointment.
Advice. Before starting treatment and prophylactic procedures with cats, prepare first aid supplies - hydrogen peroxide, iodine, bandages. This is not for the cat, but to heal the owner’s wounds received in an unequal struggle with the pet.
Video on how to quickly make a protective collar for a cat from cardboard:
Video on how to quickly make an Elizabethan collar for a cat from plastic:
join the discussion
Share with your friends
The collar for cats is used mainly after operations to help animals recover faster. After such manipulations, they become very weak, and there is also a high probability of infections. Therefore, such an accessory is very often simply necessary.
Why do you need a protective collar?
Cats are susceptible to many diseases, including those that require external application of ointment or antiseptic powder.
And also, many owners subject their pets to sterilization and after this simple operation, a seam remains for some time, which must be treated with healing agents.
But the problem is that cats are used to treating themselves by licking wounds with their tongues and it is impossible to explain to the animal that in this way he can get an infection or lick off harmful medicine. In addition, after surgery, most cats try to get rid of the bandage or surgical sutures in any way.
To prevent the pet from damaging the wound and removing the stitches prematurely, a protective collar was invented. This device restricts the animal’s movements and prevents it from touching the wound.
To prevent the cat from damaging the wound, a protective collar was invented.
When is a collar needed?
A collar is required after a cat is sterilized.
- The cat has undergone sterilization or surgery. In order for the wound to heal faster after this, it must remain dry and clean. But the animal’s instincts force it to lick the stitch, and the cat only irritates the wound with its rough, wet tongue.
- Your pet has a common skin disease that affects the inner ears - ear mites. At the same time, the cat constantly scratches its ears, which contributes to inflammation and often bleeding.
- The pet got into a fight with another cat or was injured on a sharp object, and the wound should be treated with a healing ointment.
- The animal has fleas and in order to get rid of parasites, it is necessary to treat the pet with antiparasitic agents. The problem is that such medications are harmful to the body and if a cat licks them, it can become poisoned.
- The pet has contracted lichen, and treatment involves external application of antifungal agents to the inflamed areas.
For the treatment to be effective and for postoperative wounds to heal better, the cat must be wearing a protective collar.
How to choose the right collar
You can purchase a protective collar at veterinary pharmacies or pet stores. But, since this item must be safe and reliable and not impede the pet’s breathing, choosing the right size can be quite difficult.
You can purchase a protective collar at a pet store.
Therefore, the best way out of the situation would be to make your own collar from scrap materials, for example, from a plastic bottle, thick fabric, cardboard or a pot for indoor plants.
Making it at home is not that difficult, you just need to be patient, scissors and a tape measure.
What it is?
This collar is also called “Elizabethan”. This device is used for medical purposes and has a protective function. It prevents the animal from licking itself and helps wounds heal faster. And cats do this because they are genetically programmed to treat themselves by licking. Because they have a substance in their saliva that helps rapid healing. But still, it contains not only beneficial properties, but also various bacteria that can lead to infection and the spread of infection.
The role of adaptation
The pet collar has an unusual name - Elizabethan. This is a medical device for cats that performs a protective function. It protects your pet from licking wounds, scratching, and gnawing on stitches.
READ Aggressive kitten: causes, signs, what to do, in a dream
The thing is that the behavior of cats is to heal themselves, and by licking wounds, the animal tries to speed up the healing process. However, this often has negative consequences, because with saliva, not only lysozyme (promotes healing), but also many infectious pathogens that are found in the oral cavity enter the wound area.
To prevent the cat from licking and scratching its wounds, a veterinary collar was invented. The device can be used in the following conditions:
- Early postoperative period. After abdominal surgery, a suture remains on the cat’s skin. Despite painkillers, this area may hurt, and the cat tends to tear the threads and lick the wound. This should not be allowed to happen, since licking the wound is fraught with infection and the development of purulent and septic complications.
- After castration or sterilization. In this case, a bandage may be applied, which the cat will try to remove. In order to prevent the bandage from tearing off, you need to use a veterinary cap.
- If flea dermatitis is being treated. In this case, the cat may scratch the wounds behind the ears, in the head area, which is fraught with the addition of bacterial flora. Wearing a collar should be combined with taking antihistamines.
- If a medicated ointment is applied to an area of skin, regardless of the reason for its use. The cat will lick the medicine, which can lead to poisoning. To prevent this from happening, you need to put a cap on the animal; the duration of wearing in this case is much shorter (while the drug is absorbed).
- If powder or drops are applied to the fur against ticks and fleas.
How to choose?
Choosing a postoperative collar that will fit perfectly is quite problematic. After all, it must be comfortable, strong, and also of a suitable size. When you choose a collar for your pet, you need to follow some rules: the collar should be comfortable to use. To prevent it from causing discomfort to the pet, the part adjacent to the neck should be soft. You can cover it with fabric.
- Satisfactory height. The collar should not block the pet’s view, because he may begin to worry and will not get used to the new “equipment.” Also, the collar should not be too low, then it will not interfere with the cat.
- Right size. It is also of great importance. Before purchasing a collar, be sure to measure the diameter of the neck, as well as the distance between the neck and the tip of the nose. Because if the accessory is small, then it will press, but if it is large, it will dangle, and the animal will get out of it without any problems.
- Strength. The collar should be strong, hold its shape well and fasten well. The cat should not remove it on its own. But it also cannot be too tight so that the animal can breathe calmly.
How to do it?
There are times when there is simply no opportunity to buy this device. But you don’t have to worry about this, since it’s easy to do it yourself. You don’t need various tools that only masters have; everyone has everything they need in their home. To create a collar you can use items such as:
- cardboard;
- plastic bottle;
- a flower pot.
When making this accessory, you will also definitely need a comfortable, wide and not very stiff collar to attach the collar to. You can also use a harness. In this case, the load will be placed not only on the neck, but also on the spine, which will greatly facilitate the wearing period. By following the instructions, you can easily make an Elizabethan collar.
Made from lightweight plastic
This option is the simplest. For it, you can take the simplest stationery folder. If you cut it, you will get a fairly long piece. For this design you will need:
- adhesive tape, adhesive tape or double-sided tape;
- stapler with large staples.
Before you start creating, you need to take measurements: the diameter of the neck and the distance from the neck to the tip of the nose. Then we take a sheet and draw two circles on it. The smaller one is the neck. And in order to draw a larger circle, you need to measure the length of the head from the smaller one, but 3 cm higher than it is. Then inside the small circle we draw the next circle, it should be 3-4 cm smaller, the collar will be attached there.
Next, cut out the sample and don’t forget about the reserve. If you are in doubt about the length, then cut the circle longer, and then simply shorten it. We draw a straight line from the edge to the center and cut out a sample along it, a small circle. Its also a mode of 5-6 times perpendicular for future loops.
The sample is ready, now we try it on the pet. We adjust if necessary. Then we put the pattern on the plastic and transfer all the measurements onto it. We fold what we did for the loops in half, secure it with a stapler and secure it with adhesive tape so that the ends of the staples do not get in the way. And we insert a collar or harness there.
Let's try on the collar again. If everything is good, then we connect it in the place where the cut was made and fasten it with a stapler or double-sided tape. The main thing to remember is that you will also need to put a collar on your pet. If he has a bandage on his head, then do not secure it with staples. Please pay special attention that the distance between the collar and the neck should be no less than your finger. If it is smaller, it will rub and cause discomfort, and if it is too large, the animal will easily remove the collar.
This is the easiest way to create an Elizabethan collar at home. There is no need for any special skills or various equipment. The only drawback is poor strength. The collar will fit while the animal is recovering from anesthesia, but after that the cat will begin to actively move and itch, and due to such actions the collar may not be able to withstand it.
If you have thin plastic (soft cutting board), then you should give preference to it. The collar will be more reliable, and its edges can also be processed so that they do not cause inconvenience.
From the bottle
The main task when creating a cat collar from a bottle is to choose the right container of the right size. For these purposes, two-liter bottles are mainly used. Where the neck is located, we find the diameter that best suits the circumference of the animal’s neck. Then we decide on the length and make marks. Cut off the neck. And according to the marks we cut out the future collar. The result was a cone. And to put it on the animal, you need to make a vertical cut.
Making a protective product for a pet
You can make a collar for your pet yourself. There are several different ways to make it, depending on the materials chosen.
If you don’t have time to purchase a collar, but you need it urgently, you can build it in a short time from what you have at hand. You will need:
- thick cardboard;
- tape measure;
- compass;
- stapler;
- scissors;
- scotch.
The procedure is as follows:
- On a sheet of cardboard we draw a semicircle (diameter - 20–25 centimeters).
- Cut out the part and roll it into a funnel.
- Using a measuring tape, we find out the circumference of the pet’s neck.
- At the base of the cone we make a hole, the diameter of which is equal to the circumference of the cat’s neck.
- After you wrap the future collar around the cat’s neck, its side sections will need to be secured with a stapler or tape.
READ Photo of mastitis in sows - Women's Health
How to wear?
There are times when the veterinarian did not put a collar on the animal or when you made one yourself. In such cases, the question arises: “how to put it on correctly?” To do this, you need to follow some simple rules. First, you need to measure the cat's neck so that the collar fits. It should not dangle, but also not put pressure on the neck.
Then prepare the collar. Attach it to a collar or piece of soft cloth. If the animal is scared, then take it, wrap it in a soft towel and calm it down. You need to put on the collar very carefully so as not to cause harm. Many animals do not like having foreign objects put on them, and cats can behave aggressively. In this case, you will need an assistant.
Then you will have to hold the cat by the scruff of the neck. Once her head is in the collar, try to calm her down. Then attach the collar to your neck. Check that nothing is pressing or loose. There should be a finger space between the collar and neck.
The collar can only be removed with the permission of a veterinarian.
What to look for when choosing
When buying a protective collar, focus on its size, length, and the material from which it is made.
Manufacturers, as a rule, produce collars made of plastic. This is the most inexpensive model. A reinforced collar can cost a little more - it is trimmed along the edge with an elastic band that protects the structure from breakage. A plastic collar in the shape of a semicircle is wrapped around the cat’s neck and fastened with “tabs” that are pushed through the holes on the opposite edge. Its advantage is that, thanks to the transparency of the plastic, the cat retains its usual view.
If you purchased a plastic collar without elastic around the outer edge, you can reinforce it yourself. To do this, cover the edges of the collar with a regular adhesive plaster. This will protect the upper part from the consequences of collisions with external objects and make the lower part (adjacent to the cat’s neck) softer.
If you want your sick pet to feel more comfortable, and you plan to wear the “protection” for a long time, then you can look for a collar made of soft fabric or non-woven water-repellent material. The shape of such products is a cone or a lifebuoy. The latter option is reminiscent of the pillows that passengers use for comfortable sleep on long journeys. This model is made from padding polyester, cotton or polyester and water-repellent impregnation.
It is not difficult to put such a collar on an animal, because it is attached with Velcro fasteners to a regular collar or has convenient fasteners. This collar does not have to be unfastened every time to feed your pet, because you can eat food, drink water and move actively in it. It can also be washed if it gets dirty with medicine or food.
A collar made of non-woven water-repellent materials in the shape of a cone causes less discomfort than a plastic product. The most comfortable collar for a cat is similar to a lifebuoy. You can buy a plastic collar inexpensively or make it yourself READ Fosprenil for cats - instructions for use, contraindications, mechanism of action and analogues
The size of the collar should correspond to the circumference of the cat's neck with an allowance for freedom of fit (you can stick a finger between the neck and the collar). A narrow collar will cause additional discomfort to a sick animal, while a collar that is too wide may slip off the neck.
The width of the protective field (length of the product) must be sufficient to protect the cat from harming itself. It is approximately equal to the height of the cat's head with a slight increase. If these parameters do not meet, the collar will either not perform its protective function or will interfere with the animal’s movement around the house.
Factory collars have a unique division into sizes, in which the numbers correspond to the scale of the protective field:
- No. 7 (7.5 cm);
- No. 10 (10.5 cm);
- No. 12 (12 cm);
- No. 15 (15 cm);
- No. 20 (21.5 cm);
- No. 25 (25 cm).
Thus, for small kittens, size No. 7 is often chosen, and for adult kittens, sizes No. 10 and 12 are often chosen.
What to do if he takes it off?
Most pets take a long time to adapt to the collar and initially intend to remove it. In most cases, this is an adequate reaction, but there are times when this indicates improper use, which brings stress and inconvenience to the pet. You can understand this by how much time has passed since wearing it.
If the cat tries to remove the structure for the first time, then there is nothing to worry about. You can train your pet. You just need to pay attention to him, you can sit him on your lap and play with him. This will help the animal get used to the collar. And if a day or more has passed, then it’s worth finding out whether the collar is causing discomfort (it’s too tight, the corners are digging in, blocking the view). Otherwise, it should be replaced.
To learn how to make a veterinary collar for a cat with your own hands, see the following video.
